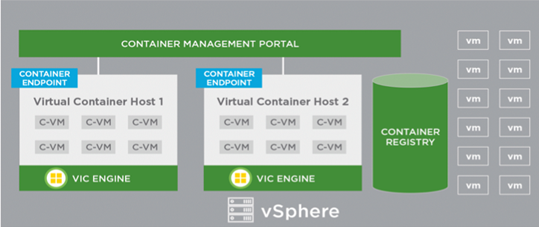
VMware has long been unable to react to the Docker revolution. Ultimately, it was decided that no changes had been made to ESXi so that the containers would not run directly in the ESXi kernel. VMware went the other way, interesting enough to look at it. Their own interpretation of the containerization is based on the PhotonOS project (CentOS-based ultra-light Linux system) and is called vSphere Integrated Containers. In this solution, VMware allows you to run a single container as an ultralight virtual machine. Sounds like a denial of the Docker idea? No, its development, with this approach, Docker host is a whole vSphere environment, not a single Linux machine. From the viewpoint of the vSphere Administrator, machines with running dockers are the same problems, they are large, loaded, it is not known what is running on them. Using VMware’s approach, it is much easier to manage containers in a vSphere environment. In this article, I will show you how to install VIC, how to start VCH docker host, and how to use Admiral and Harbor.
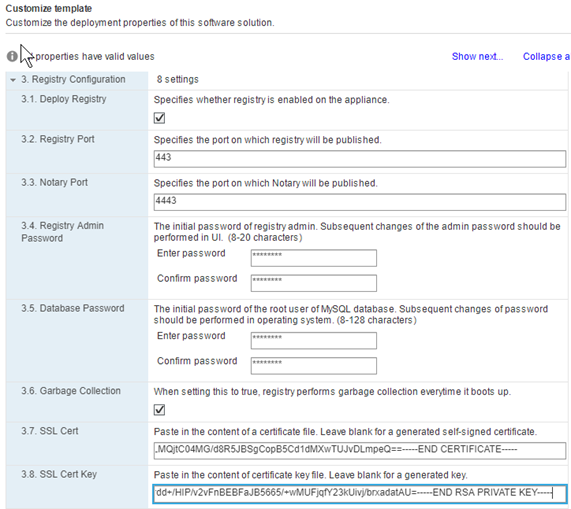
vSphere Integrated Containers are available with Enterprise license (and higher), we start by downloading VIC OVA. Deploy OVA into the environment should be done from vSphere Web Client (Flex). The most important step in the configuration is to provide the appropriate certificates for each service. Everything can be run on self-signed certificates or signed by a local CA. In my case, I generated a wildcard certificate (* .piszki.lab) which part is the IP address that will be used as VCH (VMware Container Host).
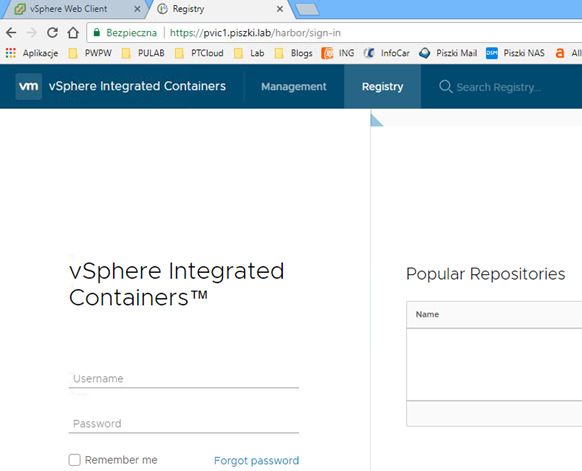
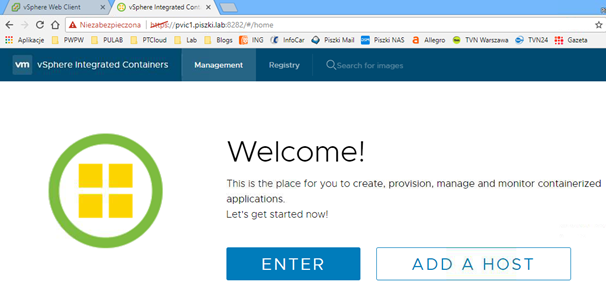
The certificate was signed by my local CA (the first IP is the VIC address and the other is the VCH). VIC is the machine on which Admiral will run (a portal to see what is going on in the container environment), Harbor (local, private container image register) and file server. An Admiral certificate is left blank (generated automatically), there is a bug that causes Admiral not to work on an external certificate, for other services we upload our own certificates. Ports are left default.
At this stage, we can log onto Harbor:
And to Admiral:
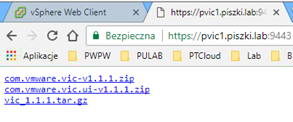
When running VIC we download from the file server (https: // vic: 9443) vic_1.1.1.tar.gz and extract it on a Windows or Linux machine.
In this article, I will skip installing the VIC plug-in for the vSphere Web Client, which has zero functionality. With the help of the vic-machine command, we need to open the firewall port with the ESXi server to allow containers to be created. To execute this command, we will need a fingerprint of the vCenter certificate.
vic-machine update firewall –target pvc1.piszki.lab –user piotr –password xxx –allow –compute-resource=LAB –thumbprint x:x:x:x…
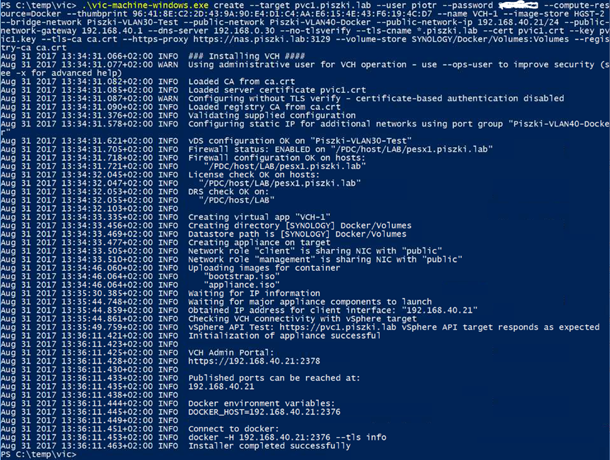
We can proceed to launch the first VCH, this is a long command which multiple switches:
Explanation of the switches:
compute-resource = resource pool, the pool of resources within which we create the host
name = VM name
image-store = datastore on which VCH VM will be uploaded
bridge-network = the network in which the individual containers will communicate
public-network = The network where the services will be assigned (docker host ip)
no-tlsverify = In communication with VCH, the docker command will not have to use a CA certificate
tls-cname = The FQDN of the used wildcard certificate
cert, key, ca = certificate and wildcard key
https-proxy = For those who do not have direct access to the Internet (Docker Hub access)
volume-store = Datastore on which we will store persistent volumens connected to containers
registry-ca = CA certificate that issued a certificate for Harbor (see above), here is the same local CA
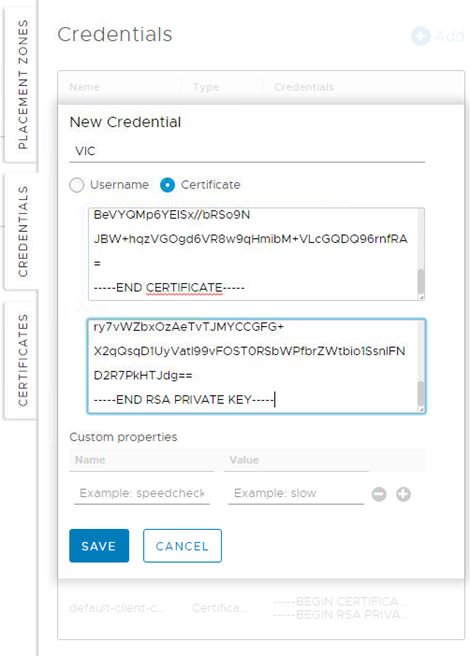
At this stage the basic configuration has been completed, we can create our first container. We will use in the beginning Admiral for this, we will of course start by adding a VCH host, to do so, we need to create a new profile with permissions (login using certificates). We paste here the same certificate and key that was used to create the VCH.
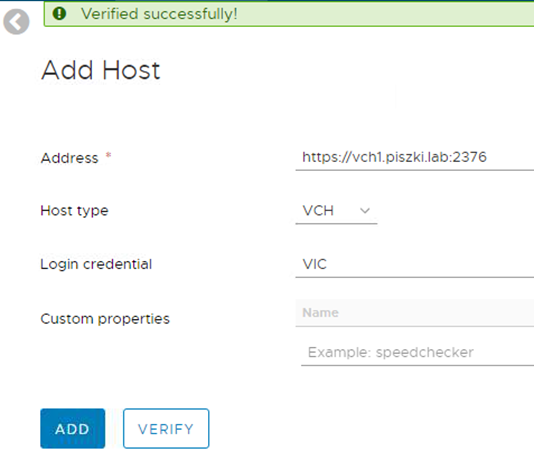
Verification should proceed correctly.
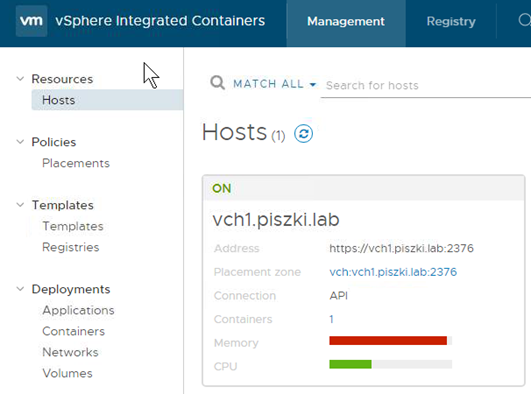
Host has been added correctly, you can see how many containers are running and CPU/Mem load.
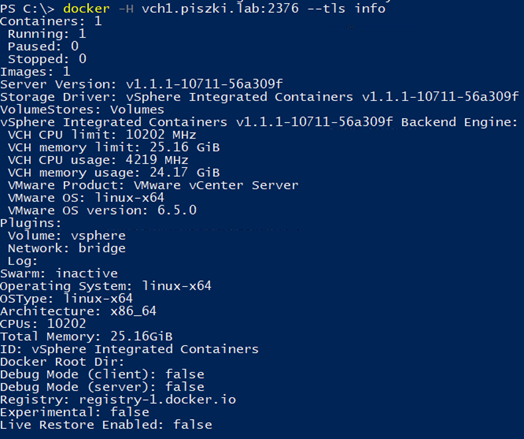
The VCH host itself only takes up 2GB of RAM, but the memory consumption indicator in the image above applies to the entire vSphere environment. This is good when we ask the host using the standard docker info command:
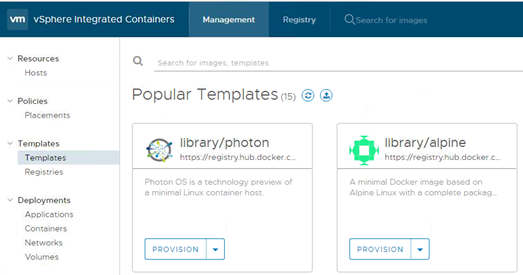
Total memory and CPU indicators refer to vSphere on which VCH is running. As I wrote earlier, with this approach to the topic, we get the Docker Host with essentially unrestricted parameters in comparison to a regular Linux VM running a container. Admiral, if it has an Internet connection, default get access to the Docker Hub from which we can generate any container.
The advantage of this portal is that we have a preview of what is going on inside the container after it launches.
Of course, we can also generate containers in a standard way (as well as handle all VCHs) using the Docker command.
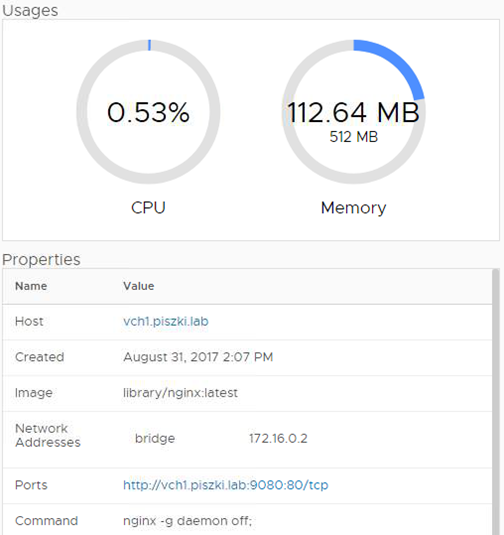
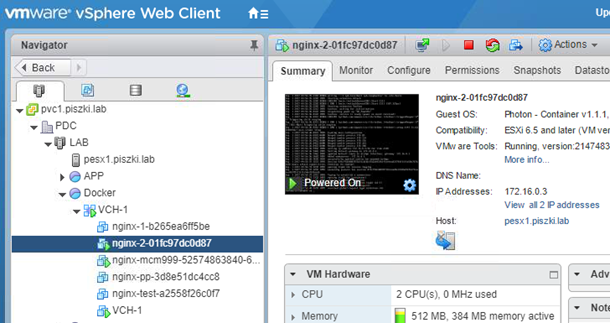
And how does it look on the vSphere side? Quite interestingly, you can clearly see how many containers have been created, how much works, and you can see exactly what the parameters are.
We will not avoid containers appearing in the vSphere environment, developers are pulling towards CI and fully automating the process of creating and launching applications. I believe that vSphere Integrated Containers is a step in the right direction, combining ESXi and Docker in a way that is ideal. This is actually the first release of this service that can be played in the environment and which does not yet support all aspects of the Docker (do not work, for example ‘docker import’ command). But on the horizon we have the launch of PhotonOS 1.2 and VIC 1.2 that push the whole solution forward. I encourage everyone to familiarize themselves with VIC because it is really worth it.




Pingback: vSphere Integrated Containers 1.1.1 – create base image and push it into Harbor (and run container with persistent volume) |