It’s been a long time since the launch of Horizon Workspace 2.1, it’s time to upgrade 2.0 to 2.1. I will not deny that the first time the new version of a product made me symptoms of shock. Horizon Workspace is a very complex product, its mastery requires a great portion of time, the same applies to the implementation. The absorption of new technologies must continue. And here from version to version changes are increasing. During migration from 1.8 to 2.0 we lost file management system, and version 2.0 to 2.1 was a complete remodeling environment. This migration path only place a new installation of 2.1 and migrate settings from 2.0! So that’s really all starts from the beginning… I decided that I will not perform the settings migration only set the new version 2.1 and configure everything from the beginning (early upgrade caused a lot of problems). Changes within Horizon Workspace are not so large, and whole configuration can be done in a reasonable time. At the end just swapping Workspace FQDN IP address from the old installation to the new (all desktop clients will connect to the new version and upgrade). Of course this post is not about the upgrade, only about load balancing (new model). As an introduction, please read the previous two posts about balancing traffic to gateway-va and connector-va (this post is a supplement).
Image by Peter Bjork.
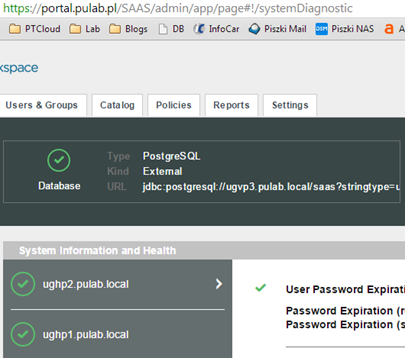
Installation and initial setup of the Horizon Workspace Portal 2.1 does not differ much from the previous version and is not the subject of this entry. Before make load balancing configuration, try as much as possible to configure in the deployed machine (eg. configure proxy, desktop clients installation files and possible patch for the bash Shellshock). At this stage, you should also do the configuration of the access to the portal, which set the FQDN Workspace:
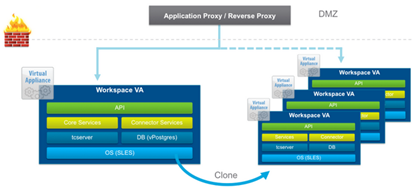
If this is the Internet address broadcast locally through NATs, at this stage we can configure our F5 (going through to the relevant part of this post). If this is the internal address (local DNS or you have “false” external zone) it is enough that we will prepare the appropriate record A/PTR in our DNS and set the Workspace FQDN (and read on). Next we just clone our Workspace Portal virtual machine. Immediately raises the question, what if someone uses an internal database? This configuration is supported, another vPostgres nodes act as a slave. However, I always use an external database.
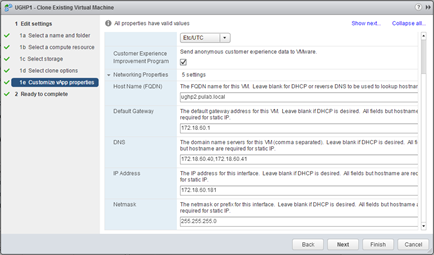
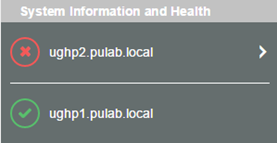
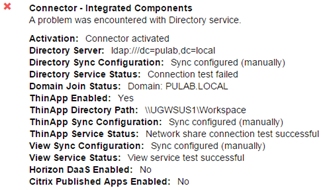
It is very important that during this operation, in the “vApp properties”, specify the parameters of the new machine, the new IP address and a new FQDN (do not forget to make a record in the DNS server). Run the cloned machine and wait quietly, remember only one, if you changed the time zone on the first node, see if it is the same on the other (must be consistent). Remember too, that this cloned machine is also a new instance of the Connector (formerly connector-va), and requires a separate set up (mainly added to AD domain):
When added to the AD domain and update password in the “Directory” everything is back to normal (the rest of the set is taken from the first node).
A lot of changes took place in the “Identity Providers”, keep in mind that all clones of the first machine will have ID = 1, the default is enabled only password authentication. We can enable Kerberos authentication on the main clones but then in the “Network Ranges” we will have to use ALL RANGES (for both types of authentication). When properly set the authentication sequence it will work OK. However, if you have a lot of customers operating outside the AD domain (or multiple AD domains), it is better to generate separate instances of Connector and use the network ranges (in this case follows the same configuration as used earlier). Install such a machine by selecting “connector only” during the OVA file upload (do not clone first machine for this mode).
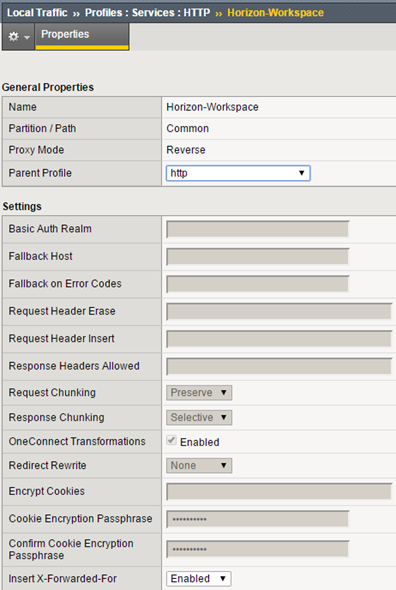
Go to configure F5, we will use the same components as in the previous configuration. At the beginning, http profile with enabled X-Forwarded-For:
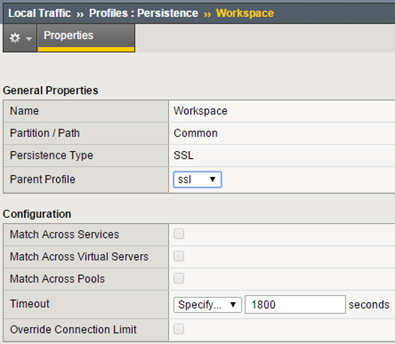
Now create a persistence profile (lengthen the waiting time for the SSL session):
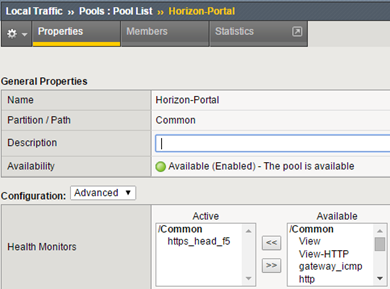
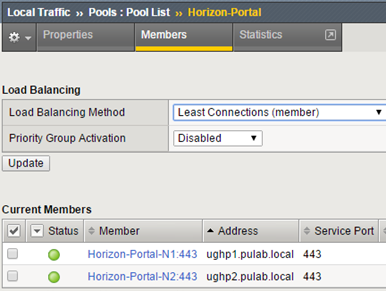
Create a pool, the monitor is https_head_f5:
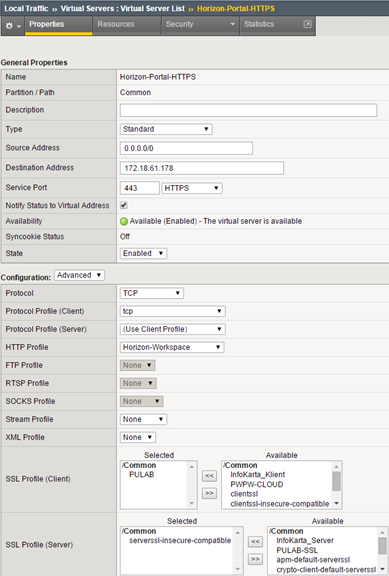
Finally, create a virtual server (Source Address Translation = Auto Map), as you can see, we use SSL profile PULAB (our wildcard) for clients, the connection to the nodes is encrypted again:
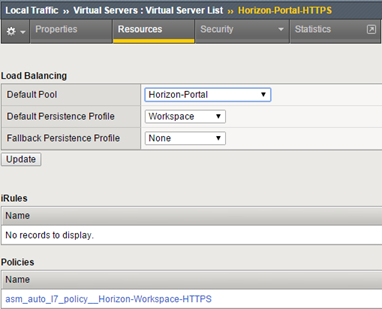
We connect our pool, profile and security policy (exactly the same from the previous installation) to the VIP:
And all this, of course, for larger installations, we can turn all the profiles to optimize traffic. A new method of generating more machines by creating clones, actually simplifies the entire process, each successive clone carries all services. In the old method, any service, for example service-va, was balanced separately.


