New times and new requirements for storage space used by the company have brought new solutions. One of these solutions is EMC Isilon. In a huge simplification, we can say that it is the simple NAS. But it is not just disk array, the heart of it all is OneFS. The architecture is based on a clustered solution (minimum starting number of units is three nodes), OneFS provides full automation of configuration (cluster initialization takes a few minutes), and the distribution of data across all nodes. There are several advantages of such a solution, the main advantage is of course no single point of failure. Node fails? Connect the new, the rest happens by itself. Another advantage is scalability, which is virtually unlimited, we connect another node to the cluster and thereby increase the available space (automatically, no configuration required). Added to this deduplication, compression, data protection and several other services. One should also mention the huge performance of this solution. Subsequent nodes not only increase the available space but also increase performance many times (by manufacturer: explosive growth in performance and capacity). And the last advantage, API. OneFS provides a REST API through which all manipulations on files can be accelerated several times. EMC also provides a full-featured Isilon simulator! The simulator is a bad word, it is a fully functional Isilon, only virtualized. Its performance be little smaller. I strongly encourage to the testing, EMC Isilon can be downloaded here (requires EMC account, this is version for VMware Workstation/Player) or directly from me (version 7.1.1, file OVA). I write here about the simulator, but the hardware configuration of the cluster looks almost the same!
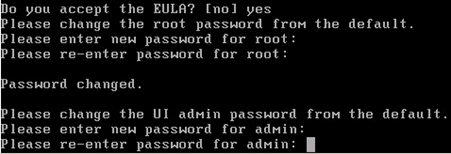
The emulator has a one possibility in relation to the hardware version, you can install one node version (but we will install three). At the beginning, deploy Isilon appliance (ova) or import the machine to the VMware Player (VNX file). Run, wait, and start to respond to the questions:
We will not need SupportIQ, we do not have the support from EMC to the emulator:
Configure the internal network (int-a), after which nodes communicate (without gates), addressing any:
Configure the external network, these addresses will be available from outside with a management service (all at the same time, as in a cluster). Isilon does not distinguish between addresses in the first or second node, they are all equivalent:
Configure our DNS servers:
We choose how to connect the new nodes, in case of a hardware cluster, this happens by Inifiband bus (automatically), here we add nodes manually:
Then we set up a date and time zone, here do not do anything, enter a valid value on the web interface. Now configure the SmartConnect service address, this is an important point and does not miss it (although it can be further defined with the web interface). This address will communicate with EMC external services, such as. ViPR.
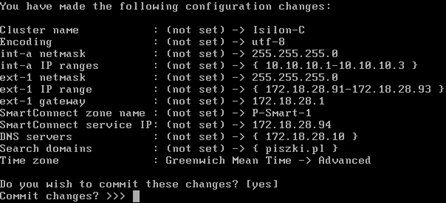
Summary of our configuration, type yes and look forward to the end of the cluster configuration:
This message indicates that everything is OK. We should also be able to ping the cluster and service addressess. Go to the web-based console (in my case https://172.18.28.91:8080/):
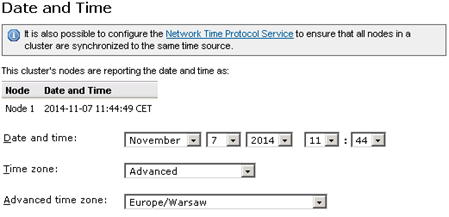
As the next nodes pull configuration from first, before we add them, Let’s finish the basic configuration. First of all, set the time correctly (and NTP server):
If we have our own Active Directory, we can immediately add the cluster to the AD. This allows us to export the network shares in accordance with the privileges of the AD:
A management interface itself is very simple (an OneFS advantage), comes down to the manipulation of pairs of privileges and shares. We create the Access Zone with precisely defined privileges (local, AD, NIS, etc.) and combine them with shares (eg. SMB or NFS). File system space is one, we have no influence on it. Now we can add another node, the procedure is similar, after deploy appliance and running it, select 2: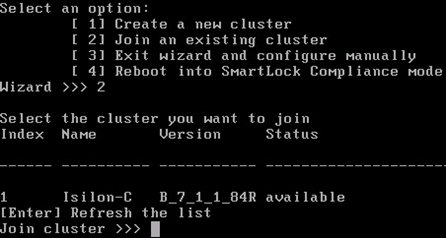
New node detects our cluster and attaches under it:
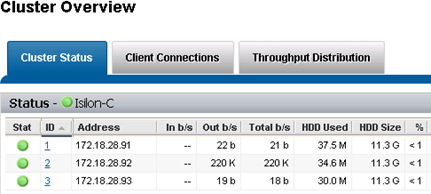
The whole procedure takes a few minutes. In the same way, we add a third node and as result we have a properly configured cluster.
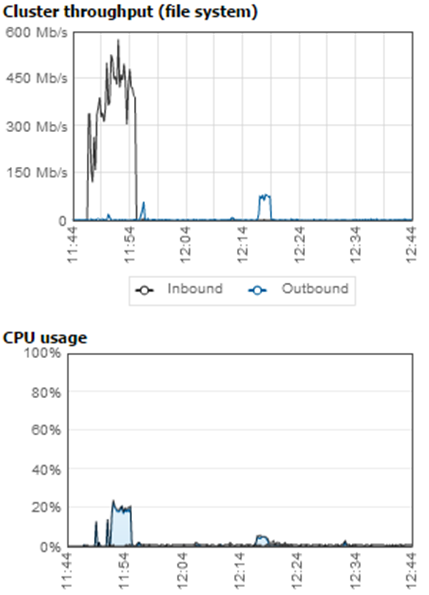
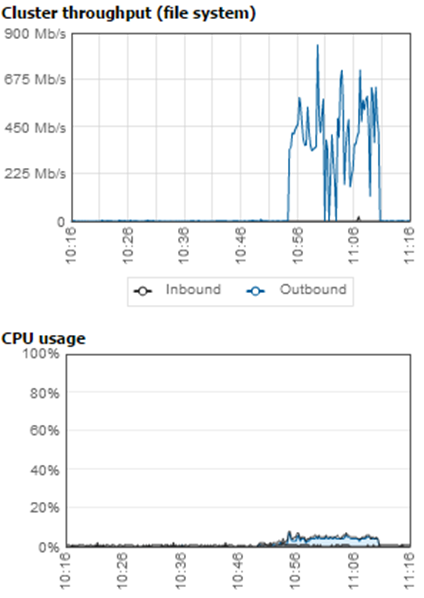
Finally, a few words about the performance. In the case of virtual deployment is dependent on where they will be sited (virtual or physical ESXi) and what drives are connected. At the moment we are at the stage of prepare physical ESXi test cluster with plenty of internal drives. Once we have everything prepared, I will try to perform the appropriate tests and post a few charts to exercise a virtual Isilon built on decent hardware. EMC Isilon hardware cluster has phenomenal performance, the following graphs made from a synthetic test and meter. 8k files record:
When reading we come to 900Mb/s. The test was performed on a virtual machine sitting on an NFS share. Without any advanced philosophy and optimization! I draw attention to a minimal CPU load.
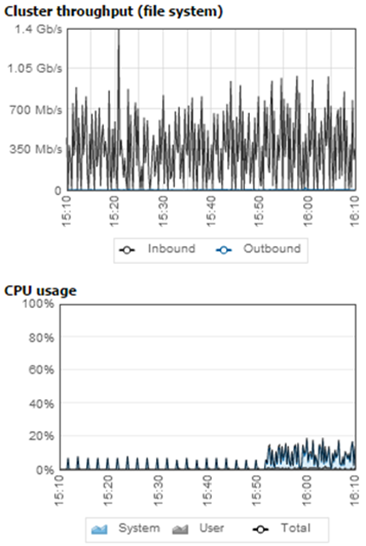
Deploy single large file:
Chart (maybe a bit garbled) with many hours of testing on the reading and writing of 50000 files with variable size. The data given in MB/s (test made witch our own software):
Conclusions are two, on the EMC Isilon lies the power! Almost 300MB/s on plain, clustered NAS. The second conclusion is that it is possible to clogged EMC Isilon quite a bit (but the average is still very good). The graph made on demo cluster from EMC consisting of three nodes. Now think what will happen at 9, 18, 36 nodes…










Pingback: نصب و پیکربندی EMC ViPR for dammies - راهکارهای جامع دیتاسنتر