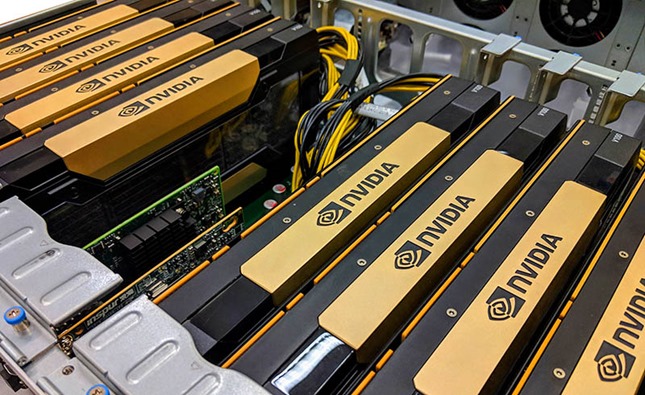
GPU cards (such as Nvidia V100) have recently gained popularity in many companies and other places (such as universities). Such a card can be used in many ways, for CUDA calculations but also for virtualization (NVIDIA RTX Virtual Workstation). Thanks to the support for vGPU, we can divide such a card according to the desired profile (more on that later) and run up to 32 virtual machines (per physical card), each of which will be able to operate with its own GPU processor. In this article, I would like to discuss two aspects in detail, the first is the physical card passthrough (one or more) to the VM and the second is the use of vGPU. In both cases, we have a VM running on CloudStack, although some techniques described here can be used in any IaaS (eg Proxmox, Openstack, vSphere and others).
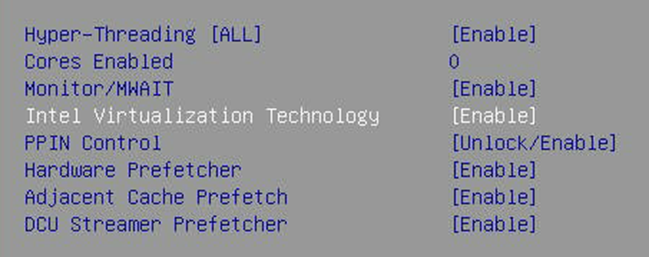
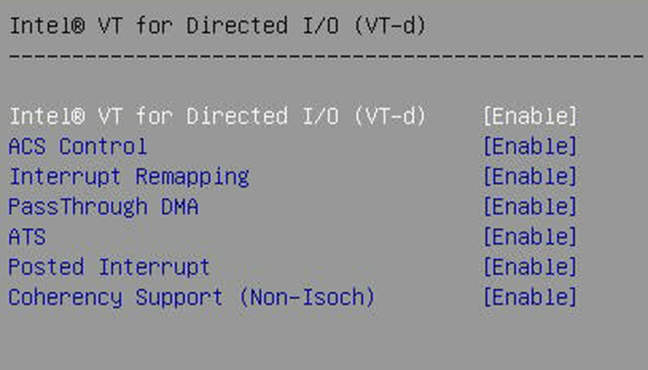
The first step is to prepare the server, the steps described below are the same for PCI passthrough and vGPU. We start by enabling IOMMU, this is a key phase, without IOMMU support we will not be able to isolate the PCI card for redirection to the VM. Generally in BIOS or UEFI of different manufacturers it is described differently, we usually have two functions, the first is to enable virtualization and the second is to enable IOMMU. In Supermicro, for example, these two options are called Intel Virtualization Technology and Intel VT for Directed I / O (VT and VT-d):
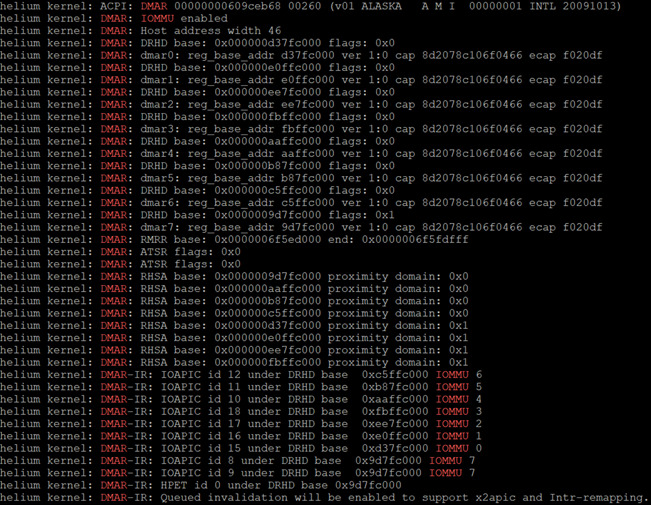
After rebooting, we issue the command cat /var/log/messages * | grep –E “DMAR | IOMMU” or dmesg | grep –E “DMAR | IOMMU”, expected effect is the message IOMMU Enabled:
In the next step we need to disable the native Nvidia Nouveau driver which is part of the kernel. We do this in two places, one is to create /etc/modprobe.d/nvidia.conf with the contents:
We add similar content to /etc/default/grub:
Then we need to generate new initrd images, it is worth doing after updating the system and rebooting, we issue the following commands:
Then we restart the system. At this point, we have the server prepared for further steps, we can verify the presence of the NVIDIA card or cards in the system to be sure:
In this particular case, we have four Nvidia Tesla V100 cards connected with SLI, so it is a very serious bitcoin miner, obviously a server for serious scientific calculations ![]()
Let’s start with the PCI passthrought (GPU is nothing but a PCI card) using VFIO. The whole configuration will apply to CentOS 7 but in general it is very similar on other Linux systems. Here, we additionally need to pass the cards to the VFIO driver, in the picture above you can see the Vendor-ID and Device-ID parameters (second column from the right), this data must be entered in the /etc/modprobe.d/vfio.conf file:
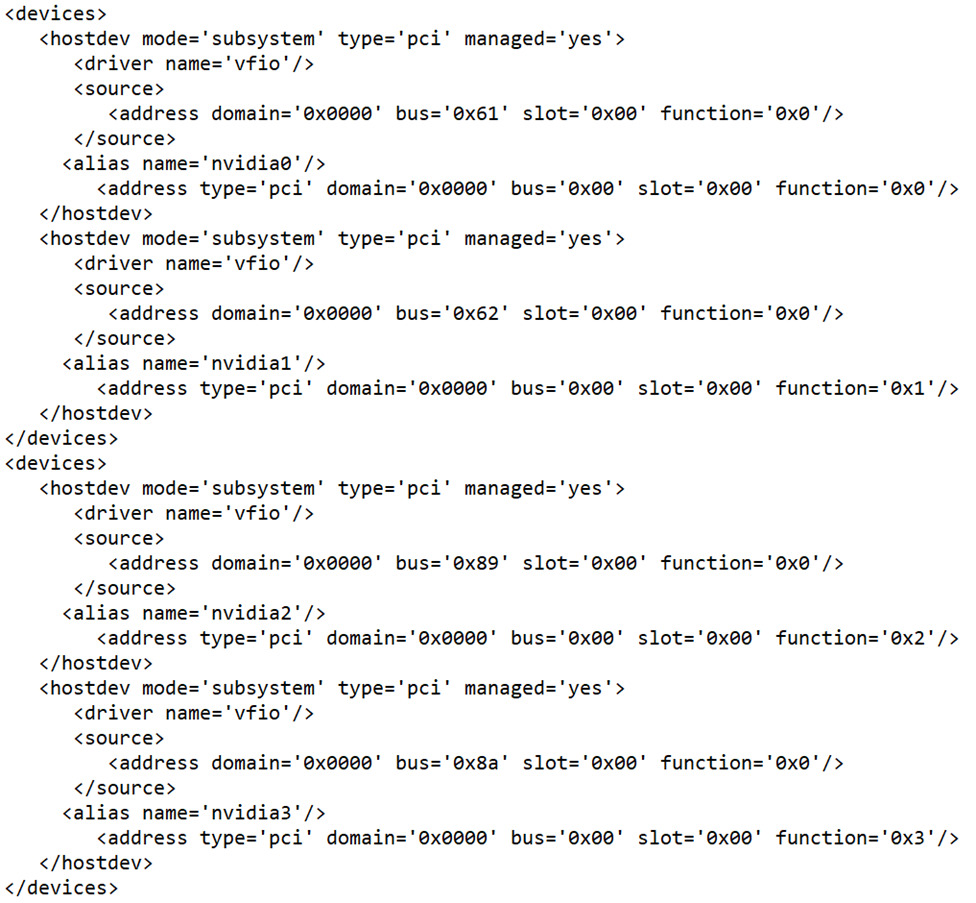
In the case of a single card, we enter it once, in the case of more cards, as many times as we have (even if the IDs are the same). We restart the server and look for vfio entries in /var/log/messages after the reboot. We can now move on to CloudStack and into KVM in general. A virtual machine is fully described by an XML file, giving it a GPU device is nothing more than supplementing its configuration with a definition of such a device. For my four Tesla cards, it looks like this:
It’s not complicated, bus = 0x61 corresponds to the address from lspci (picture above, first column, first row), alias and address is the PCI definition inside the VM. For four cards, I had to break the definition into two parts due to the limitation of the input field in CloudStack. Uploading this configuration in a VM in CloudStack requires the use of the extraconfig option for the existing VM. We can do this as standard using CloudMonkey (CMK):
This wild string in the above is device definition converted to url encode (API works over http, information must conform to standard). In CloudstaCk version 4.15 and above, using the new UI Primate, we can add the same to the VM in a simpler way by adding the extraconfig-1 option in the VM settings. In the case of a single GPU card, extraconfig-1 would suffice, I had to break the four cards into two entries:
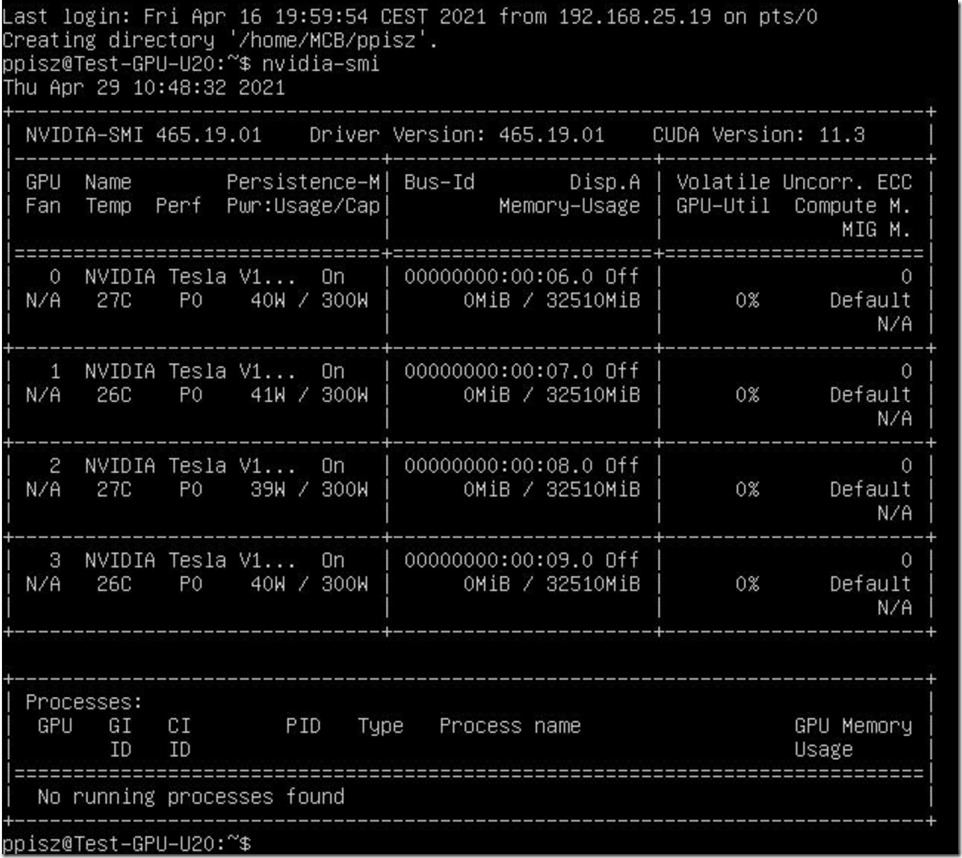
Next, we install the drivers in the VM in accordance with the Nvidia documentation, the installer itself adds the appropriate entries blocking the Nouveau driver. The expected effect is a properly working nvidia-smi command in VM (after reboot):
And that’s basically it, we can mine, yuck, do heavy calculations ![]()
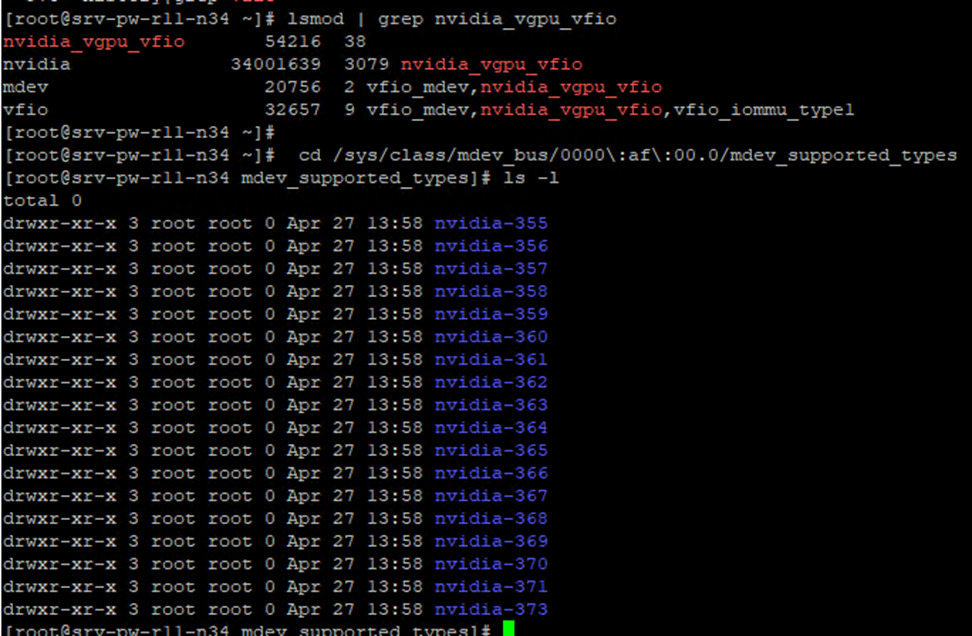
The above-described configuration applies to the simplest form of GPU transfer to VM, now we will deal with the more interesting one, Nvidia allows you to divide such a card into vGPU. Of course, I mean cards that make this possible, such as the Tesla V100. Unfortunately, this feature is licensed, the licenses are very cheap (Nvidia RTX Virtual Workstation costs $ 400), or you can generate a temporary license for 90 days. In addition, we also have to install a license server, we download the software and licenses from the Nvidia License Portal. On the server (with iommu enabled and the nouveau driver blocked) we install Nvidia drivers, the expected effect after restart is a working nvidia-smi command as shown in the picture above. Additionally, is the Nvidia VFIO driver running correctly:
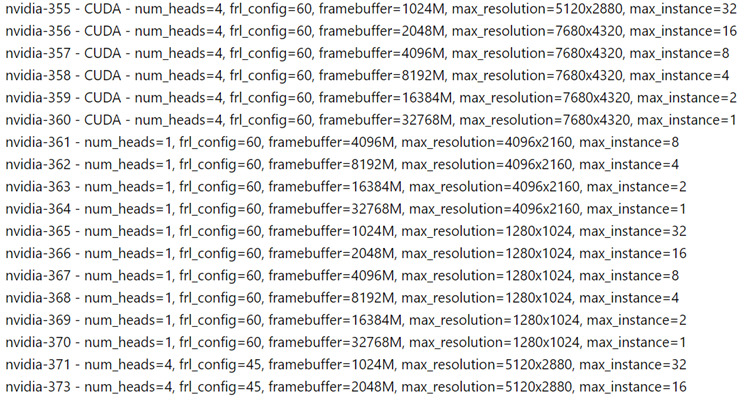
Now we have to decide what GPU profile we want to use, it is important that only one can be used at a time. In the picture above, nvidia- * means just available profiles, you can go to each directory and read the description file where the properties of a given profile are described in detail. We will use nvidia-358 (profile 8Q):
This profile is important because it supports CUDA. The vGPU generation process is simple:
XML preparation with the device is very similar too (and importantly, we can use multiple vGPUs in one VM on the same principle as I do with four physical cards):
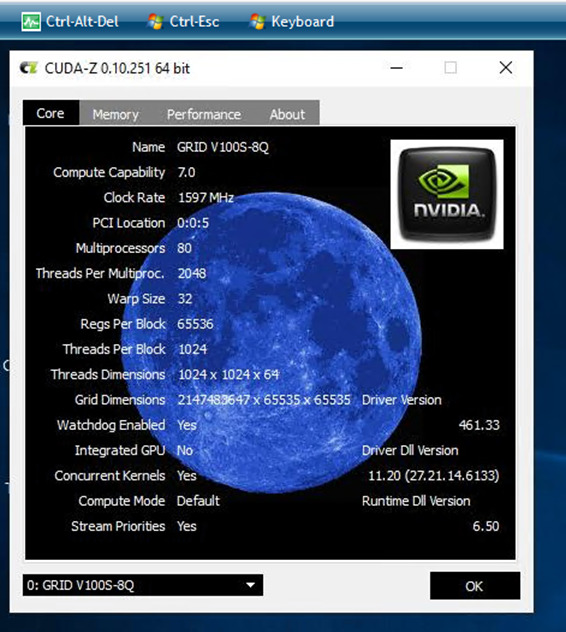
In CloudStack, we proceed exactly as described above, in the VM we install drivers and CUDA, the expected effect is of course everything working properly:
Finally, a word about the console. The VM generally starts with an emulated QLX graphics card and this card starts first. To disable QLX, we need to properly prepare the GPU device file, we just have to remember to install the Nvidia drivers beforehand, without that, we will have a message on the console about the lack of initialized drivers for the graphics card. The XML file looks like this:
The content of NVIDIA vGPU profiles looks like this:
And that’s basically it, if you have questions on this topic, please leave your comments.








9 Comments
Leave a reply →