Most of the IaaS solutions (CloudStack, vSphere, OpenStack, Proxmox etc.), so far focused on virtual machines, very intensively develop support for containerization. The leading standard at the moment is Kubernetes, support for it can be found in VMware vSphere (Tanzu project) and in CloudStack (kubernetes plugin). The approach to containerization in IaaS is more or less the same everywhere, containers run in lightweight VMs, and the IaaS platform is designed to facilitate cluster startup and management. Today we will deal with the latter solution, configure CloudStack step by step and launch a Kubernetes cluster. The CS documentation for version 4.15 is quite detailed and has up-to-date links to the ISO images you need, be sure to read it.
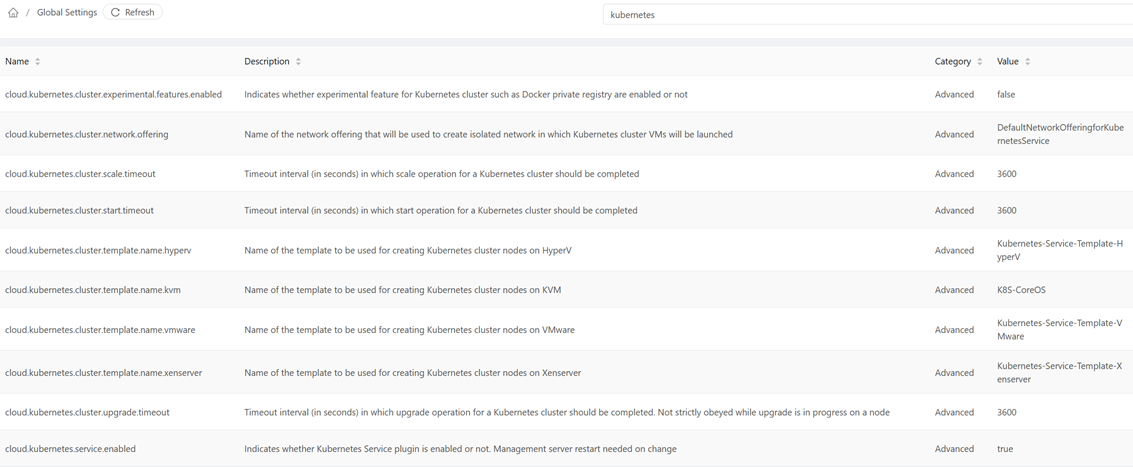
In the first step, we need to enable the plugin by setting the cloud.kubernetes.service.enabled option to true, then restart all management servers (cloudstack management and usage). You can also turn on the registry, but this is the basic functionality, if we have such an option, let’s run Harbor on our cluster, definitely a different class of solution.
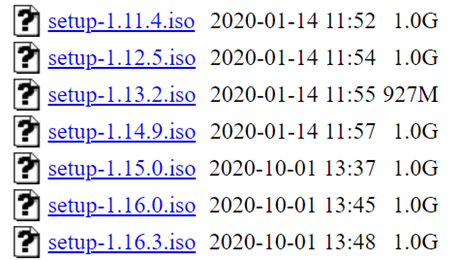
As you can see in the picture above, the name of the KVM template “K8S-CoreOS” was also entered, which will be discussed below, it is also not worth changing the name of the default network profile (it will be used if the network is not selected), changing this name causes an error when starting the cluster. In the next step, we need to import the ISO file with the supported version of kubernetes. This file contains the appropriate images and software to accelerate the startup of the cluster. We download the available images from this page, at the moment the following versions are supported:
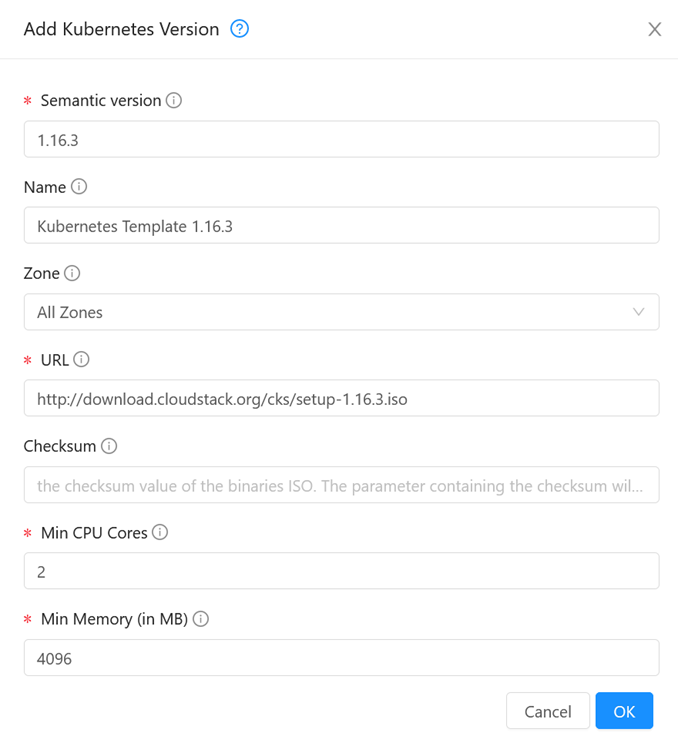
Import the appropriate file in the Images -> Kubernetes ISO section:
After the ISO is downloaded, the status is Ready:
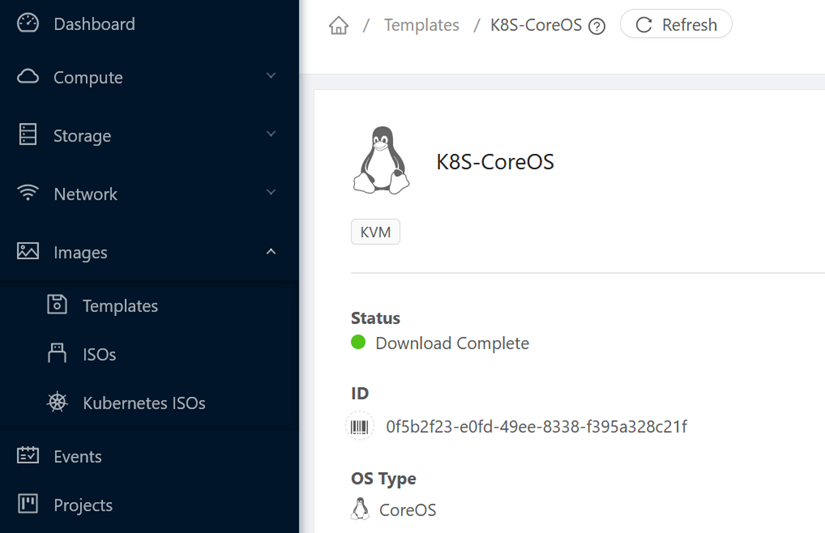
Then we download the CoreOS image file, which in this version is used as a lightweight VM for containerization, in future CoreOS releases it will be replaced by Debian. The files are available at this address, download the template, unpack it and register it as a standard system template. Finally, if we want a standard user to be able to create kubernetes clusters, the CoreOS template must be public.
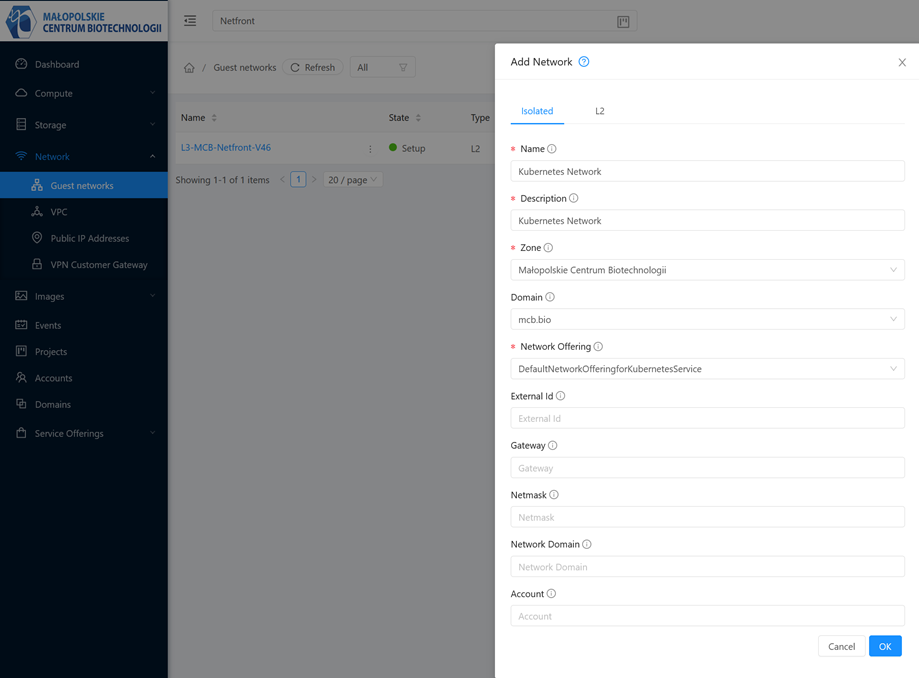
In the next step, we create an isolated network in which the kubernetes cluster will operate. Although the appropriate form allows you to choose any previously created network, let’s not do that, the whole thing has been prepared for operation in isolated networks. A single network serves one cluster, for many clusters we need many networks (each consumes VLAN).
This network works just like any isolated network in Cloudstack, we can create additional VMs in it (e.g. if we need a system from which we will manage the cluster at a lower level):
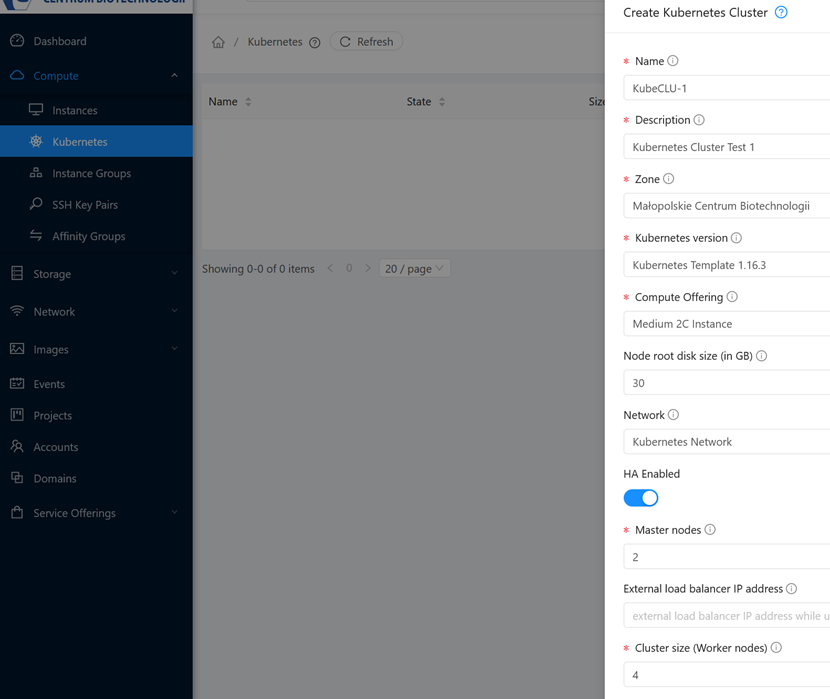
In the last step, we start our kubernetes cluster. By default, the plugin runs one Master Node and the number of Worker Nodes defined by us. It is also possible to start the cluster in HA mode, then new Worker Nodes are created and appropriate LB rules are created on VR. Within an isolated network, the plugin creates all relevant NAT and FW rules.
Such clusters can be run at any level, e.g. a regular user can include it as part of his project. All cluster-enabled VMs are clearly visible and can be managed individually.
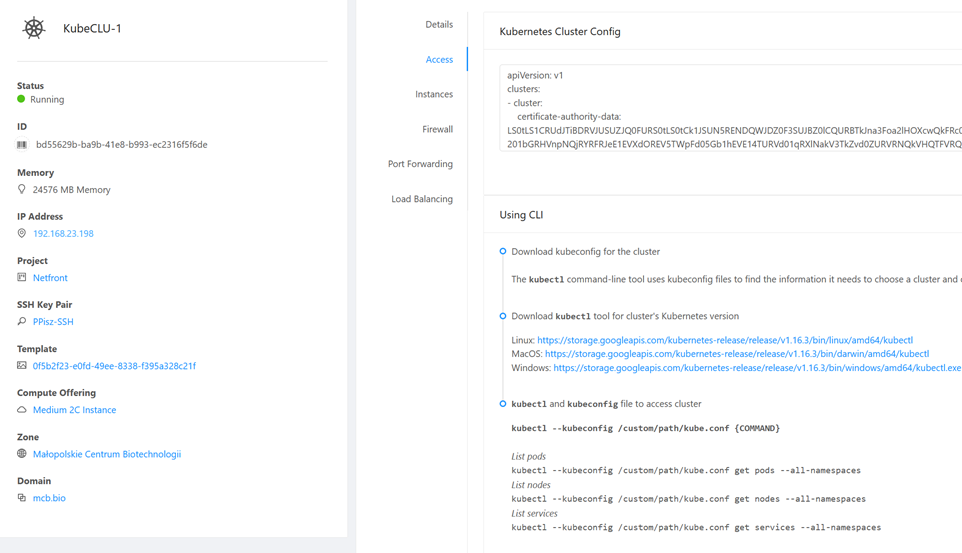
All the necessary information is clearly provided in the Access tab, here we can download the kube.conf file and download kubeadm directly:
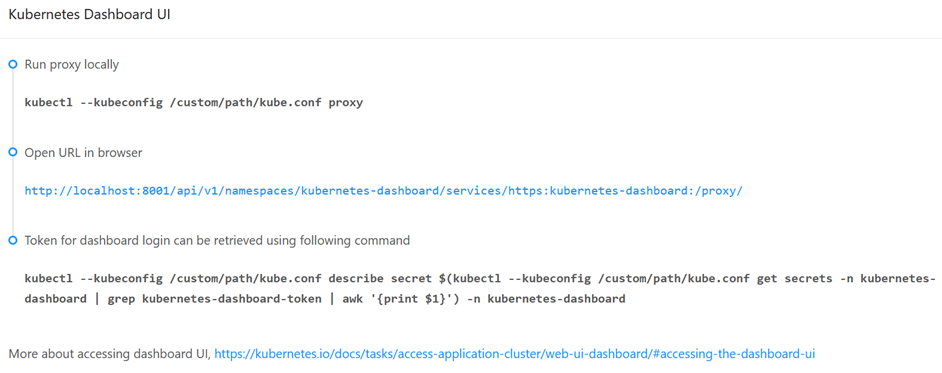
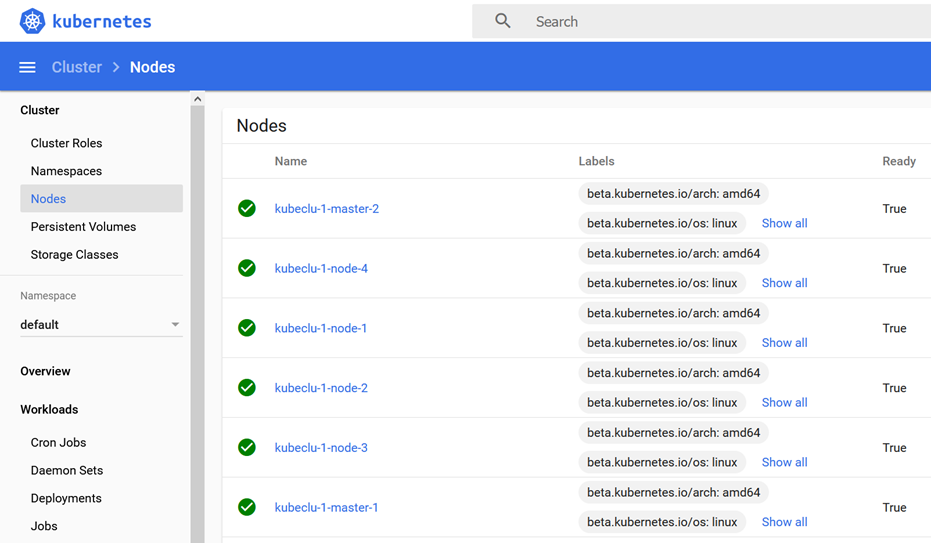
The cluster automatically starts Kubernetes Dashboard UI, in UI CloudStack we have information on how to connect to it:
As you can see, the whole solution is very simple, in just a few steps we have the first kubernetes cluster running. It should only be remembered that the whole solution is behind the virtual router, when running applications inside the cluster, remember to open the correct ports on the firewall.






2 Comments
Leave a reply →