With so-ranking title, must immediately answer the question of why we have to balance traffic without so cool solution which is the iApp (for View)? The answer is simple, using iApp, do not do anything you did not anticipate its creator (for example, did not anticipate the use of security policies, and there is no BLAST protocol handler). The main advantage of iApp is the speed of implementation, a few clicks and you’re done. Manually takes a little longer but the effect is the same and the possibility is much larger. In the configuration I have described, I used the balancing of traffic at connection server level without security servers. I believe that balancing security servers does not make sense, in the end F5 has to replace them! Of course in our network are such servers, they are the traditional security gateway for privileged users (VIP), which is mainly Administrators. The same applies to the internal network, can simultaneously connect through F5 (User) or directly to the connection server (VIP). This configuration gives us a high degree of flexibility and resilience to potential failures and a lot of opportunities for Administrators.
According to what is seen in the figure, first of all we must fulfill several conditions. On the external firewall must be open and redirect to the appropriate address in F5 (in my case 172.18.31.130) the following ports TCP: 80, 443, 8443, 4127 and UDP: 4127. We must create an external DNS record (view.pulab.pl) that in the LAN will be resolved as the local IP (NAT). Same configuration of the Horizon View does not deviate from the standard, in our case the connection to the machine is encrypted, we can connect via BLAST. Due to the load on the network, connections servers not function as a proxy for the PCoIP protocol (we use Thin terminals).
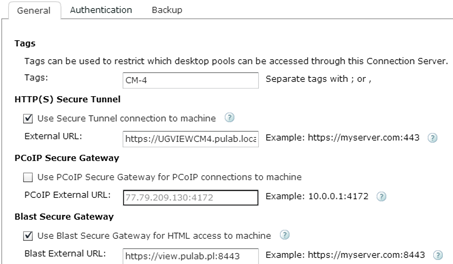
Connection Server configuration:
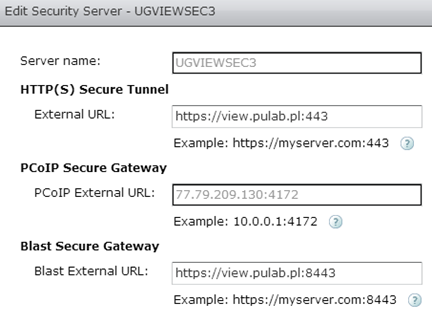
Security Server configuration:
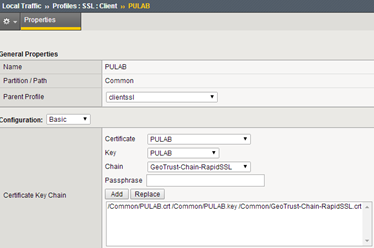
F5 BIG-IP can be used for terminating SSL connections (offload). To run connection server on port 80, we must create in directory C: \Program Files\VMware\VMware View\Server\sslgateway\conf a file named locked.properties with content: serverProtocol = http (and restart service). An additional advantage of this configuration is also the fact that you do not need to create a virtual server (F5) on port 80 to redirect traffic. Port 80 is redirected to a 443 by the connection server (when we use browser). Now go to the F5, at the beginning we will create all the necessary profiles. We start from the Client-SSL, in our case we have a Wildcard certificate and one profile that we use for all virtual servers (PULAB):
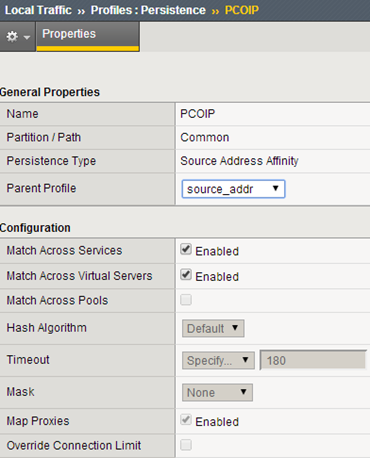
In the described configuration, address view.pulab.pl (accessible via F5 from the outside and inside) will be used with the wildcard certificate, and all connections servers will have their own certificates issued by the local CA. In the next step we create a profile to maintain connections (persistence):
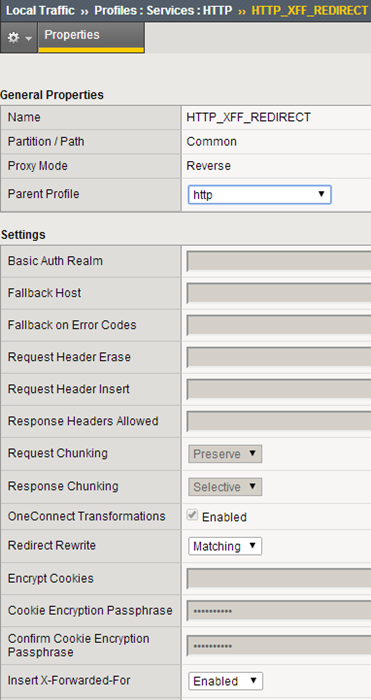
Create a HTTP connections profile on port 443:
We create a monitor for Connection Servers (according to the documentation of Horizon View):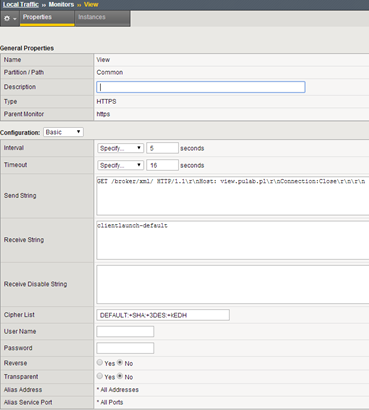
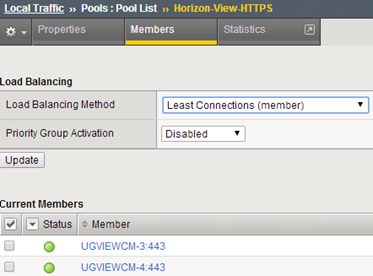
Now we create pools of server, we start from HTTPS, port 443, health monitor as above:
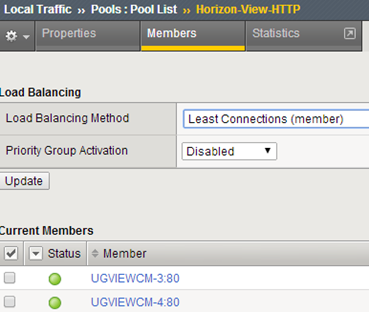
Pool HTTP, needed to perform SSL offload on F5, health monitor as above:
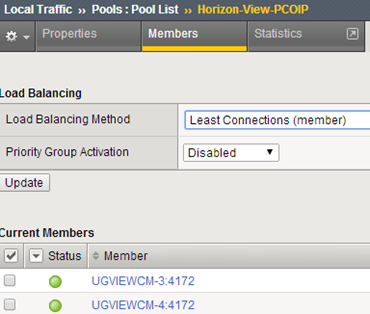
Pool PCoIP, port 4172, health monitor “gateway_icmp” (on the firewall at all the Connection Server add a rule ICMP/PING):
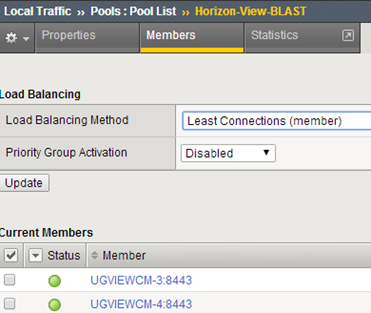
Pool BLAST, port 8443, monitor “gateway_icmp”:
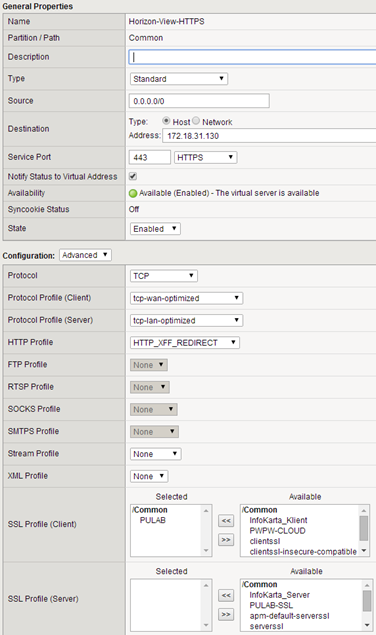
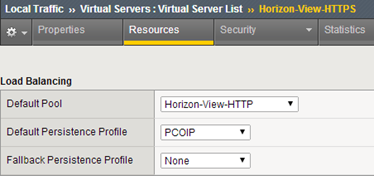
In the next step we move to create virtual servers, start from Horizon-View-HTTPS (SNAT-> AutoMap). As seen in the drawings, do not use SSL for the server profile and a HTTP server pool, with this configuration is performed on F5 to SSL offloading:
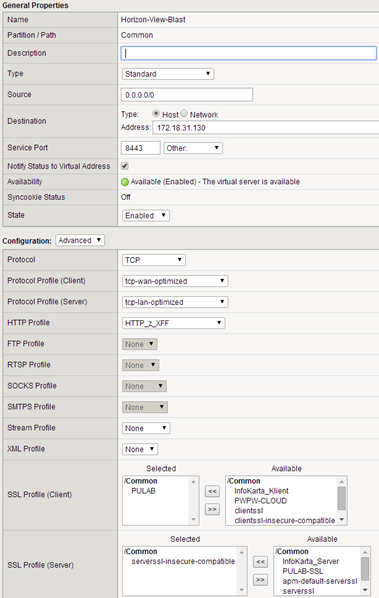
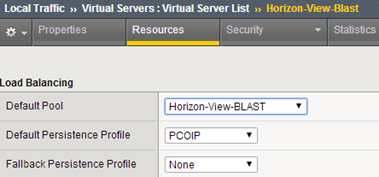
Then create a virtual server responsible for handling BLAST / HTML (SNAT-> AutoMap), in this case the connection to the server is encrypted (SSL offload is not supported by BLAST):
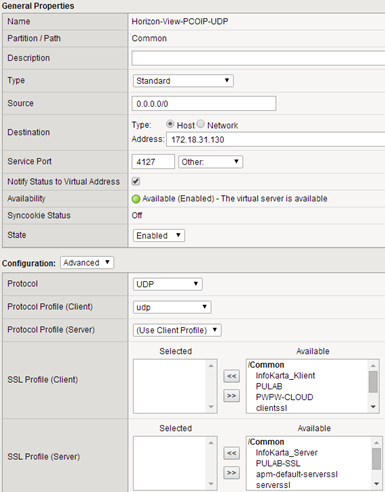
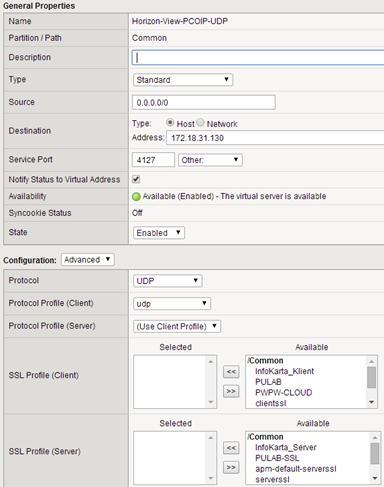
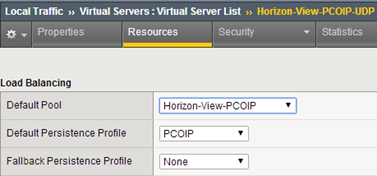
The last step is to create virtual servers to support PCoIP protocol (UDP / TCP):
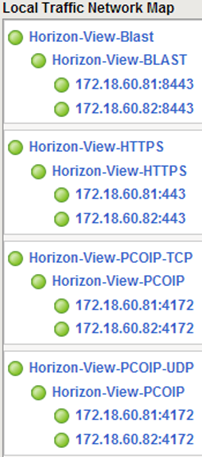
Map of our virtual servers is as follows:
This setup works very smoothly and efficiently. The described solution in the original version has been tested in F5 BIG-IP VE, however, due to capacity constraints, F5 VE version is suitable only for small test environments. I greet and wish you a successful test.


