Software-defined storage (SDS) is developed at a dizzying pace. At the moment, we have to choose from a whole bunch of solutions, eg. VMware vSAN, EMC ScaleIO (which is based on Ceph), GlusterFS, XtreemFS and at the end, Ceph. Unfortunately, to date, none of these solutions natively supports features such as deduplication (only vSAN 6.2 supports deduplication and compression). In this article I will show you how to install, on three nodes, Ceph Jewel cluster (the latest stable) based on disks (OSD) formatted with ZFS. The ZFS source are Solaris OS (and Sun Microsystems, now Oracle), now it is fully ported to a Linux system. For the first time also received the full support on Ubuntu LTS 16. The purpose of this exercise is to test deduplication on SDS (which ZFS supports) and check whether it is possible. But remember, Ceph officially does not support OSD on ZFS.
Test cluster consists of three virtual machines running Ubuntu LTS 16 (their names are uaceph1, uaceph2, uaceph3), the first server will act as an Administration Server. Before we begin, we need to make appropriate startup configuration on all cluster nodes. This applies to the APT sources, correctly configure the proxy (if using), and create a user by means of which we will supervise the installation and operation on Ceph cluster (ssh). In addition, we need to configure name resolution for nodes, we do it either through DNS or through the /etc/hosts (all hosts must be see by long and short names). Add the source of APT (for each server):
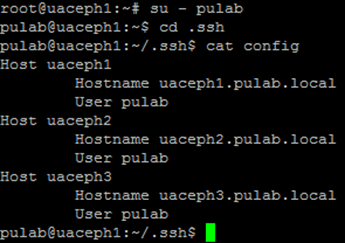
Configure the user (for each node), in my case it will be pulab. Configure the user ssh keys (ssh-keygen with an empty password) and using ssh-copy-id to transfer the key to all other Nodes (ssh-copy-id hostname). In the .ssh directory, create a file where we give the parameters of the connections:
If you use a proxy server in /etc/apt/apt.conf add directive “Acquire::http::Proxy http: //proxy:port;” and an proxy must be entered in the file /etc/environments.
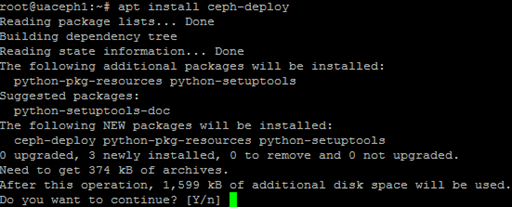
Again, before you start further configuration make sure that all Nodes solve each other names (long and short). User created by you can perform ssh without login and password for all the Nodes, and on each node have synchronized time (very important). If everything is ok, then on the first server (Administration), install the Ceph-deploy.
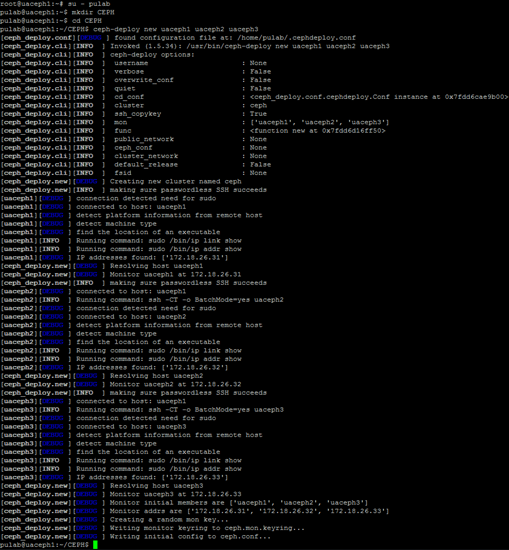
From the administrative user create a directory (its name is automatically Ceph cluster name) within that directory issue the command:
ceph-deploy new server1 server2 server3 (important to give all hosts)
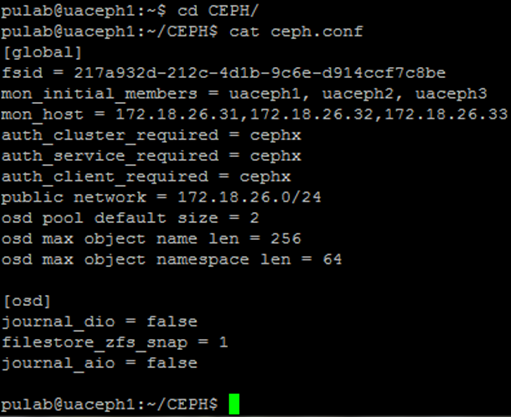
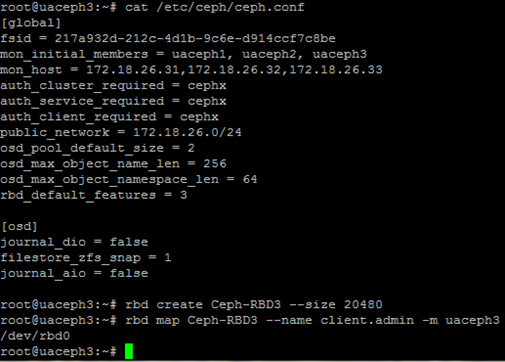
In this way, we create initialised configuration, at this stage add to the file ceph.conf all lines starting with the public network. The entries for the configuration of the OSD are specific requirements for interoperability with ZFS (apart from the default pool size).
When we have prepared a configuration file, we issue the command cluster installation on all nodes. Installation takes a long time, if break on one of the servers, we can start again only for the selected server.
After installing the packages run create initial configuration for all monitors.
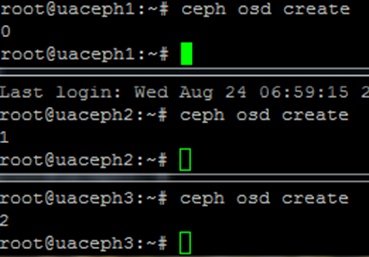
At this stage, we have set up and operating Ceph cluster without connected drives (OSD). When configure the OSD will you use ZFS which does not support script ceph-deploy, from that moment all the steps execute manually on each server separately. We start with the issue of the “ceph osd create”, returned number is the ID of the OSD (which we used in the later configuration).
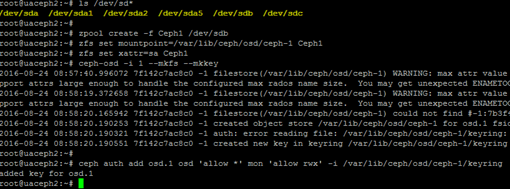
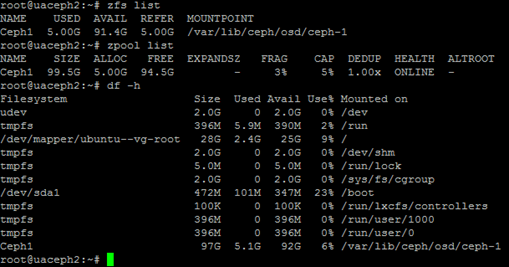
For each server I have added two additional drives, OSD will be on /dev/sdb. On this disc we create ZFS pool, pool covers the entire disk and is at the same time a file system (FS). In a single pool can be create a lot of FS (but here is not needed). Using the command “zfs set mountpoint” mount the drive in a directory compliant with OSD ID, the image below shows the configuration of the second server (uaceph2).
Command “ceph-osd -i (OSD ID) -mkfs -mkkey create a Ceph filesystem and authorization key. The server should look like this:
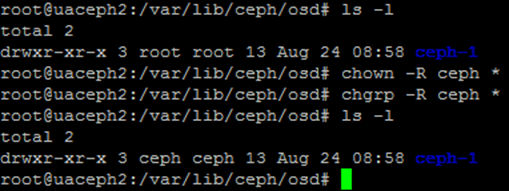
In the next step, we check the permissions in /var/lib/ceph/osd/ceph-id on each server, if the owner is other than the user ceph, change to correct.
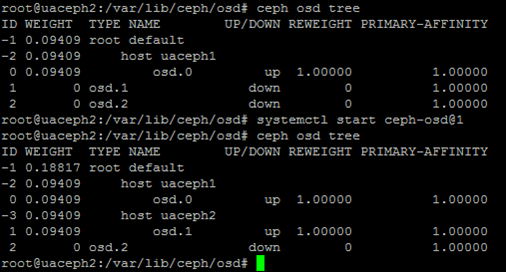
Next start (activate) the individual OSD on every node (systemctl start ceph-osd@ID), by the command “ceph osd tree” check if the OSD stand up properly.
At the end check the status of the entire cluster, we should get HEALTH OK.
Congratulations, we have a functioning Ceph cluster based on ZFS. We can proceed with the tests, I used the RBD block volume, so I add a line to ceph.conf rbd_default_features = 3 (kernel in Ubuntu LTS 16 not assisted all Ceph Jewel features), send a new configuration from Administration server by command “ceph-deploy admin server1 server2 server3” . The next step is to create a block resource by command “rbd create”:
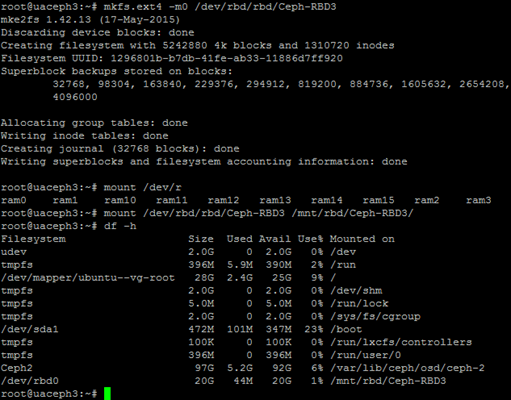
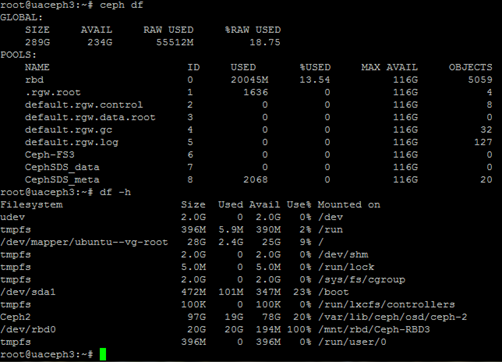
Block device must be formatted, here it was used ext4. We have here a kind of Inception, the main OSD drives have been ZFS formatted and volumes have Ext4 (can be the other way around). The customer gets a standard drive that can reformat any FS, but whereas the SDS can turn global deduplication or compression and it will be transparent to the customer. Mounted FS:
Time for a test, I copy nine ova images (each the size of 1GB) and a dozen ISO images. Before turning on deduplication resources present themselves as follows:
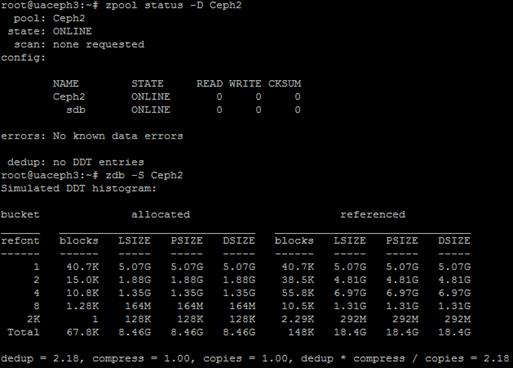
Now we go into deduplication, first make sure that it is turned off and whether it is worthwhile to turn it on.
Is not enabled, the command “zdb –S” tries to simulate the value of what we get when turned on, the value is calculated dedupe = 2.18, which can be safely turn deduplication on. ZFS is extremely easy, set parameter dedupe = on and wait.
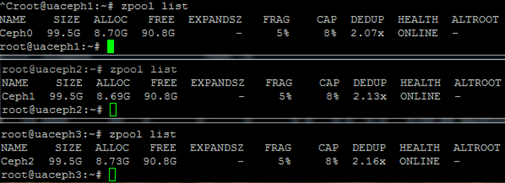
If you get tired of waiting, in the framework of acceleration we can remove the data and upload it again. Generally, deduplication works great over the Ceph cluster:
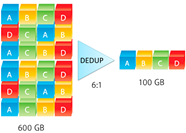
Where can we use this configuration? For example, in Proxmox VM that supports ZFS and Ceph. Enabling deduplication in SDS, where data are multiplexed, can bring large savings of disk space.






3 Comments
Leave a reply →