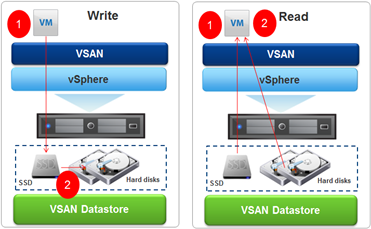
I will not conceal that this is my second attempt to vSAN at home Lab. The first ended in total failure which can be summarized by the word “too short queue depth.” The second approach is more solidly prepared and technology in the meantime changed. Instead the first version of vSAN now we have vSAN 6.2 that has been heavily redesigned in terms of performance and generated load on the device. In the meantime born faster SSDs based on 3D-NAND and a little easier on the controller with appropriately long queue commands (queue depth). In my Lab I have only one server (for now), I decided to build vSAN based on Dell PERC H200 controller, disk Samsung Evo 840 120GB and HGST 7K1000 disk. Controller H200 is the cheapest controller that can be bought on the open market (Ebay), even though it was out of the VMware vSAN HCL is still well suited to this task (queue depth a length of 600, current recommendation is not less than 256 and preferably 1000 or higher). Disk Samsung 840 Evo does not have to represent, class of its own, I bought a 120GB (recommendation is 10% SSD in the total pool, but it depends on how much we have hot data). HGST drives K71000 is a quick drives to laptops with 32MB cache (I have a two and perfectly suited as a local datastore in ESXi), are quiet and do not heat up too much. It remains to answer the question: why? Of course, in order to improve performance as shown below!
Before we begin, a short note about what we find on the Internet. Those wealthier put Lab vSAN clusters based on Intel NUC and M.32 drives, once the cost of such a solution is enormous and two, it’s still home equipment with queue depth at 32 (and why it matters read here). Therefore, before you design own solutions think twice about what you do and how much it will cost you. The start with vSAN on vSphere is not difficult, of course, it will show here but I would mainly focus on the procedure of preparing the controller. As it happens, we can without any problem to upload to H200 latest BIOS (P20) from LSI (actually Avago Technologies) which supports direct exposure drives to the system without RAID (which is required for vSANs but also for example with ZFS on FreeNAS ). The whole procedure is not simple (especially for owners of motherboard with UEFI), but what is important, feasible and reproducible (you not destroy the controller).
In the first step you need to prepare a USB stick with FreeDOS. We use the original firmware P20 IT:
File LSI-9211-8i.zip pre-loaded with all the necessary programs and firmware taken directly from me, you unpack the archive contents directly onto the USB stick. Holders of the old BIOS are simpler and can skip the part about the UEFI. Holders of the newer motherboards to boot in to the FreeDOS must disable Secure Boot, the description below refers to the Asus boards but it is equivalent to other manufacturers.
Procedure to disable UEFI:
Enter to UEFI Bios, go to the Advanced section or immediately to the Boot section (connect to the motherboard previously prepared memory stick). Go to the item “Secure boot”, should be set to “Windows UEFI”. Go to the position “Key Management” (Enter) and position “Save Boot Keys” and save the keys to the USB stick. Then, in the position “Delete PK” delete the keys, reboot and “Secure boot” is off (the procedure can be reversed).
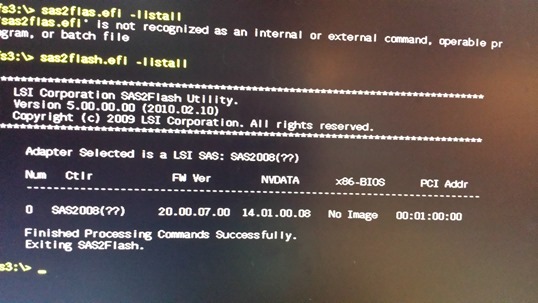
Upload new firmware to the Dell PERC H200 comes down to two steps, erase the old (DOS) and install the new (UEFI or DOS). Holders of standard BIOS perform all the steps without booting in UEFI using the exe commands (in archive we have two command sas2flash.exe and sas2flash.efi). Holders of motherboards with UEFI must be boot first from USB stick in UEFI mode (on UEFI Bios in Boot options select UEFI first). After starting the UEFI Shell enter the correct flash drive (USB) indicating the number of the device (in my case fs3, type fs3: (enter) as when changing the drive in Windows CMD). In the first step, we issue the command “sas2flash.efi –listall” and display a list of controllers (here after uploading the firmware P20):
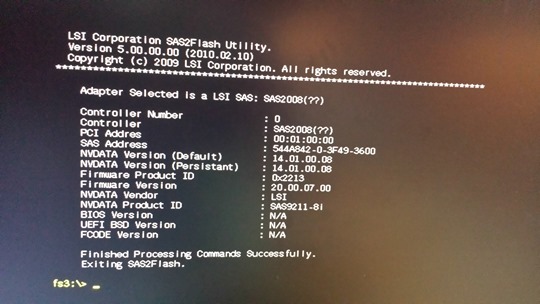
Then the command “sas2flash.efi -c 0 –list” display card details. At this point you have to write down a SAS Address number which will be erased and you will have to set it up again.
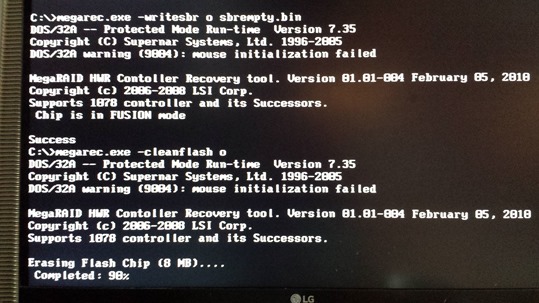
At this point, we do reboot and start with a USB stick under FreeDOS (in UEFI Bios on Boot options set Standard boot first). The procedure to erase the old firmware performs with the command megarec.exe:
megarec.exe –writesbr o sbrempty.bin (o not zero)
megarec.exe –cleanflash o (o not zero)
In case of problems, you can always try to erase and upload new or old firmware. After successful erasing the old firmware do reboot and go to UEFI mode. Contrary to appearances, to complete the procedure we must upload three different firmware. We start with the following command:
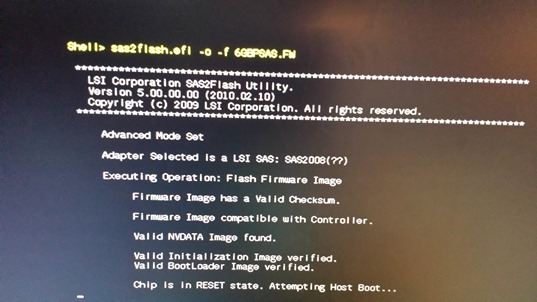
sas2flash.efi –o –f 6GBPSAS.FW (o not zero)
Then load new firmware with command:
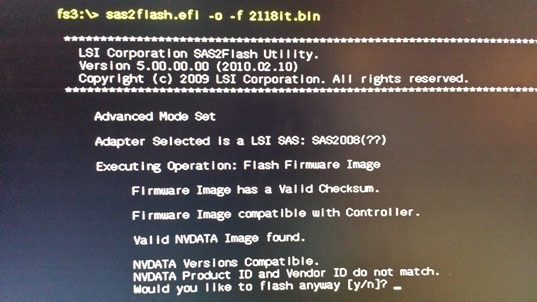
sas2flash.efi –o –f 2118it.bin (o not zero)
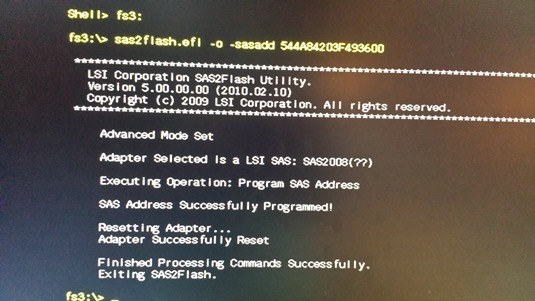
In the next step we restore the SAS Address with command: sas2flash.efi -o -sasadd “stored number”:
At this point, we have a fully functional controller that can be managed with CLI (Linux and Windows), if you would like to have access to the standard controller BIOS we have to overdub the third command:
sas2flas.efi –o –b mptsas2.rom
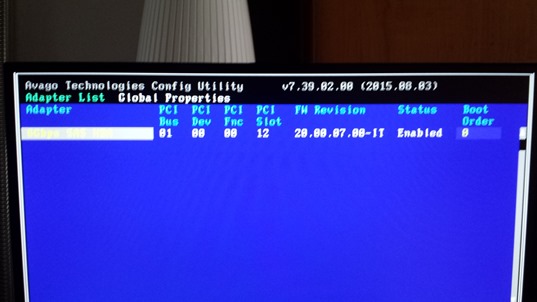
Reboot and enter to the card Bios, as you can see the firmware uploaded is 20-IT, all connected drives should be visible without a problem.
As I said, I have only one server to run properly vSAN (one node) in this configuration, I need to modify the relevant parameters from the esxcli:
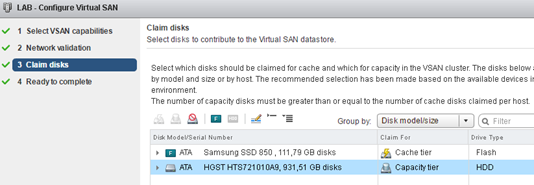
From the vSphere Web Client for the selected cluster (containing a single ESXi) configure vSAN. Here you can see two drives plugged into the H200 controller (SSD as cache and HDD as Capacity).
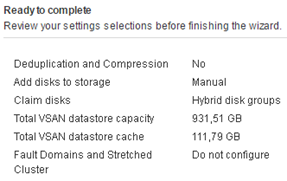
I create a hybrid pool (do not have enabled deduplication and compression).
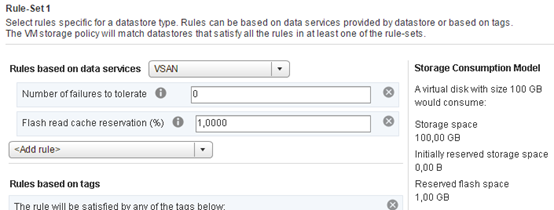
In the last step we have to create their own storage policies, the default is not adapted to operate on a single node. There is no point for example to duplicate data with a single HDD, reserve 1% on the cache will guarantee that every machine will have a little cache (avoid a situation in which more verbose machine pushes eg. the domain controller from cache). Here, of course, a lot depends on your ingenuity.
It remains the answer to the last question, whether in such circumstances it makes sense, and whether it works at all? I will not conceal that I personally tormented recently the general failure of the disk subsystem, at some point hard to do anything when the latency on the disk does not fall below 50 milliseconds. In the solution, such as vSAN for most operations frontend is SSD divided 70% for reading and 30% in writing and must admit that it works. This is particularly evident when write operations hit at 100% in the SSD, read cache builds slowly (this can be a little control with the policy). Another problem with the vSAN was always a moment of reconstruction and copying data between SSD and HDD. In vSANs 6.2 data is collected and copied with continuous stream (and not, as was in the first version, basically through random what killing queue depth). However, you can observe a lot of latency (short-term) when moving data, fortunately, the whole environment is stable, does not clog up and running efficiently, I am happy so far.
This was the previous work of the local Datastore (as you can see, the tragedy)
And after migrating all the machines on the vSAN (SSD + HDD, I have plan to add another HDD so it will be even better):


