Holders of the vCloud Suite 6.0 license may already be convinced, that part of the license no longer includes a vCloud Networking and Security component. If you use (as we did) Trend Micro Deep Security, which requires to function (agentless) vShield Endpoint and App. It becomes clear, that the migration to vSphere 6.0 must be preceded by vCNS migration to VMware NSX. Recently vCloud Suite 5.8 license include vCNS 5.5.3.1 version which does not support vSphere 6.0. When we have a standalone license, it is available vCNS version 5.5.4.1 which supports vSphere 6.0 (with a note that the new vSphere 6.0 features have not been tested with vCNS!). The choice to solve the problem belongs to you, but it is clear that this is the end of vCNS. The latest NSX 6.1.3 supports vSphere 6.0. Described below upgrade was made in vSphere 5.5 with vCNS 5.5.4 to 6.1.2 NSX.
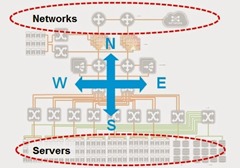
If you already have become owners of VMware NSX, the same process of migrating the current environment is not too complicated. Let us remember, that the main novelty of the NSX, which is north soutch and east west traffic and all the associated requirements for the environment architecture is really a recommendation. In the basic version, which is the NSX Manager -> Guest Introspection (Endpoint) -> Deep Security (or similar), does not need to put NSX on a separate cluster. After the upgrade, rethink and checking all new NSX features, we can proceed to the new architecture of our environment or leave everything as it is.
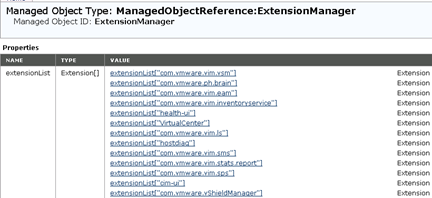
After reading the documentation for VMware NSX 6, the appropriate section on the upgrade vShield Manager to the NSX you get the impression that it is a trivial process. Generally it is, but as usual, the devil is in the details. To all ended correctly and without too much stress, you must first perform a snapshot of vCenter and vShield Manager. In the second step, you must uninstall the vShield Manager plugin for vCenter. After the upgrade, one of the steps is registration NSX in vCenter, during this process erases the old plugin and install a new one. This procedure often fails, so the safest way is to manually delete the old plugin before we do anything else. We go to https: // vCenter / mob and remove plugin com.vmware.vShieldManager.
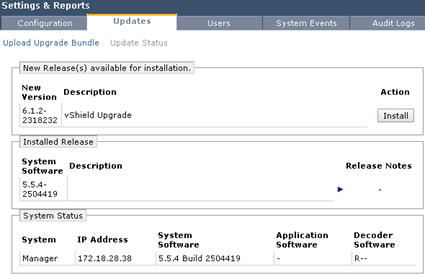
After this step, we log in to the vShield Manager, go to the Settings -> Updates where we load the file containing the NSX data. Remember too, that one of the conditions that we must meet, is increase vShield Manger and App/Edge to version 5.5 before upgrade to the NSX.
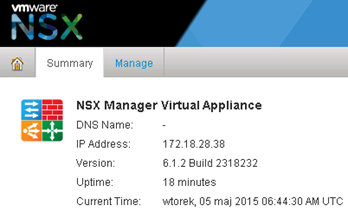
Upon completion of the upgrade process, which lasts very quickly, we need to take another two steps. First, close all active sessions with vSphere Web Client and empty browser cache, then shutdown the NSX Manager and increase the RAM to 12GB and the number of CPUs to 4 (minimum). Start it and wait until everything starts to the end (recommended controlling the CPU load on the machine). We go to the former address of the vShield Manager and log in to NSX:
An advantage of making the upgrade is that most of the configuration is taken by NSX from vCNS (NTP, Syslog, permissions, and network settings, SSL Certificates). Now we log in to the vSphere Web Client and check if properly install a Networking & Security plugin.
If so, then we move on to the next step. If not, then go back to step one, we check in https: // vCenter / mob that appeared vShield Manager plugin (yes yes). If so, we delete it, if not, then move on to the NSX Management Services and reconnect NSX in to vCenter. At this stage, we go to the vSphere Web Client –> NSX Networking & Security –> Install –> Host Preparation and click Resolve:
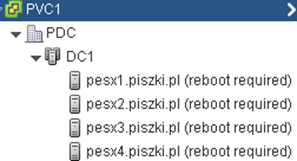
The procedure fails, reboot is required for all hosts:
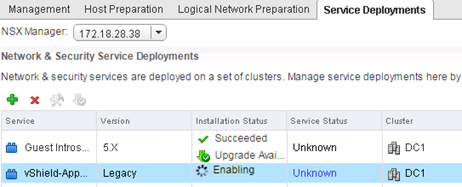
After the restart, before we make the process again “Resolve” turn off vShield App on each of ESXi (and DSVA if we use Deep Security), thus avoid many of the problems involving the accidental severing the host from the network (and hence, the services, including vCenter). Click on the “Resolve” and look forward to the completion of the installation procedure of NSX Manager agent on each host. As you can see in the picture below, this procedure is really the upgrade and run of the new agent in legacy mode. But be careful, clicking on “Update” will automatically run DRS throughout the all environment, including at least two restarts of each host. It is a lengthy procedure and significant impact on our environment!
After performing “Update” it looks like this (at this point we can safely turn it back on old vShield App):
Navigate to the “Service Deployements” and in the section vShield App, click the “Resolve”. This procedure will connect the old vShield App to NSX Manager. When we needed a vShield App and Endpoint only to support Trend Micro Deep Security, we can at this point safely uninstall vShield App (its functions were transferred to level up).
In the next step we upgrade vShield Endpoint. Let us remember that in vCNS on ESXi was installed vShield App and the Endpoint but only App take the form of virtual machines.
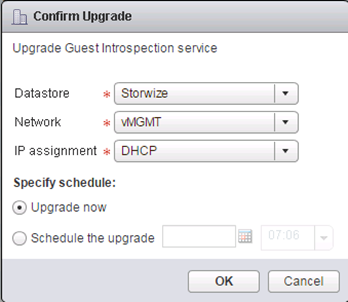
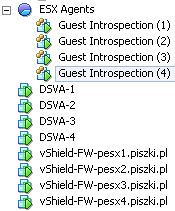
By doing upgrade of vShield Endpoint on each ESXi we Install a new virtual machine named Guest Introspection. In addition, it should be noted that all VM’s must be installed with the latest VMware Tools (those containing Guest Introspection driver).
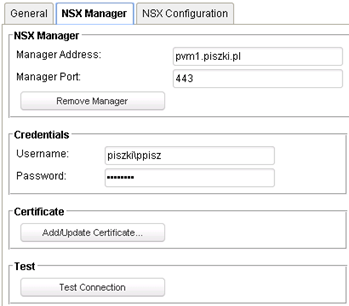
At this stage the basic functionality of Trend Micro Deep Security, which is agentless protection, has been restored. DSM detects that it is connected to the NSX as can be seen in settings:
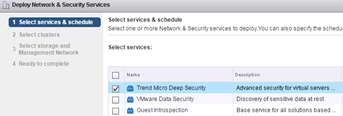
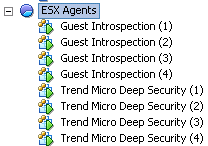
Although the settings are taken from the vShield Manager in this section we perform a “Remove Manager” and re-register it. Without this step DSM not configure NSX to show in the “Service Deployments” Trend Micro Deep Security service. This service is really DSVA, the install will install on each ESXi new virtual machine named Trend Micro Deep Security. In DSM ‘old’ DSVA they will be automatically deactivated and the new activated (and take on the role of old). Old DSVA at this point can be off and removed from the vCenter.
The end result looks like this:
The exact configuration of Trend Micro Deep Security with VMware NSX can be found here. The question arises, make an upgrade or installation from scratch? If you are using only EPSEC, make upgrade. If you plan to use NSX on a full-scale, the installation from scratch (in my opinion) is better option, the choice of course depends on you.


