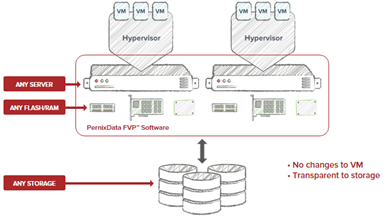
I work as an Systems architect in the design and implementation work, passed through my hands a lot of solutions (mainly under the testing of new technologies). Honestly I say that PernixData FVP very positively stand out against other solutions providers readings acceleration feature (from disk arrays). As the only solution also provides writes acceleration on the server side. We do not have any hardware requirements (eg. a dedicated flash card) and operate in fully automatic mode (just point datastore and VM). PernixData FVP 3.0 Freedom Edition is available for free, license restricts us to one vCenter and up to 128GB Cache in RAM (flash is not supported). If you use for example SSD as VMware vFRC (vFlash), PernixData adds another, ultra-fast acceleration layer!
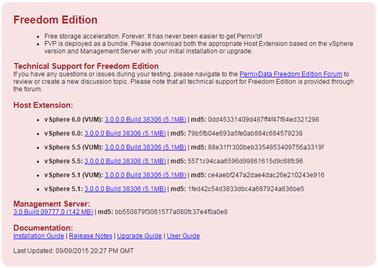
The installation itself is very simple, start by filling out a short form on PernixData, after a while we get a confirmation email with an account and just after him comes another email with activation key. After logging in to the PernixData Support you can download two components, Management Server and the extension of the host (VIB) for the relevant version of the vSphere (from 5.1 to 6.0).
We start from install host extension. Put ESXi server in maintenance mode, the same extension can be installed with VMware Update Manager (Note, VUM will restart the host!). Or manually with the console (reboot the host must make yourself).
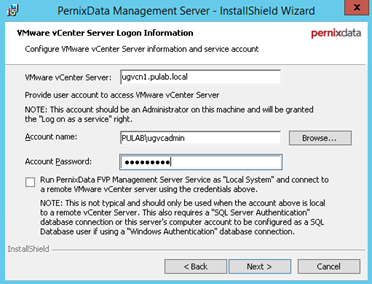
PernixData FVP Management Server software is for Microsoft Windows Server also required Microsoft SQL Server (with domain or local authentication). In our Active Directory domain create a user who is a local administrator on the machine where you install Management Server, will have administrator rights on vCenter and DBO permissions on MsSQL Server. Run the installer, in a first step we give permission to vCenter (on vCenter is installed extension and plugin to vSphere Web Client).
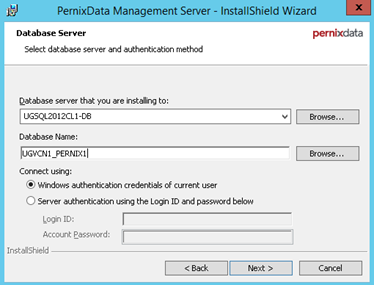
Then we give MSSQL server and database name.
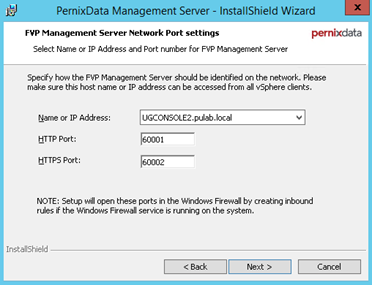
Then choose as the Management Server to be identified within the network, as it involved SSL certificates, of course, choose a name and not an IP (you can change the ports on the other).
At the end we get the information that the installation will start a 30-day trial period. This means that 30 days we will have the full version allows for writes acceleration! Only after this period, we can upload the license “Freedom Edition”.
At this point, the installation process is completed. The latest version 3.0 FVP management is done from the Management Console, available through the browser at https: // MGMTSRV: 60002. Before we get into the whole setup, we replace SSL certificates with self signed on issued by our local CA. The main CA certificate should be imported as “Local Machine” to container “Trusted Root Certification Authorities” on the server on which you installed the Management Server. The exact procedure to generate new certificates for the Management Server is described here (KB: Creating custom SSL certificates for FVP in the Knowledge Portal support.pernixdata.com), you can obviously generate a certificate + key from Microsoft CA and then convert the file pkcs12 respectively. Prepared files new-cert and new-key copy into Program Files\PernixData\FVP Management Server\Server\conf and restart the service “PernixData Management Server”.
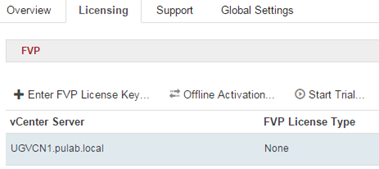
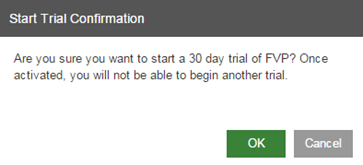
In to the management console you can enter directly from the vSphere Web Client or from the above address. Proceed to configure the whole, we start by going to the section PernixData Hub -> Licensing and start the trial period (this is a necessary step).
The trial period can be run only once.
On the same screen, you can check the status of the environment. Trial license does not set us constraints (we can test Flash card), but the license “Freedom Edition” limited us to only one vCenter and only 128GB of RAM cache. In my case PernixData FVP will accelerate single cluster of four hosts. Acceleration is enabled (ie the extension of the host is working properly).
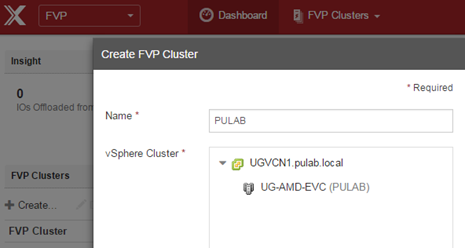
From the main menu, I choose FVP and create our first cluster.
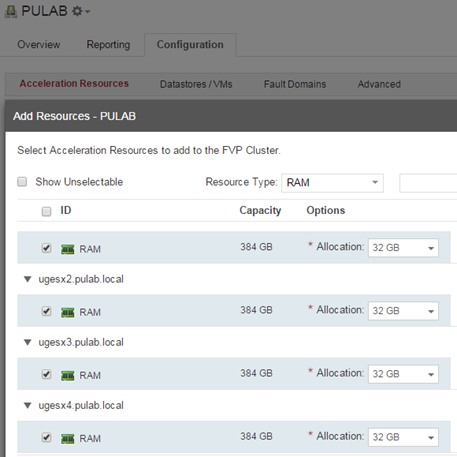
Click on the name of our cluster and go to the “Configuration” in which we start adding acceleration resources. In our case it will be RAM.
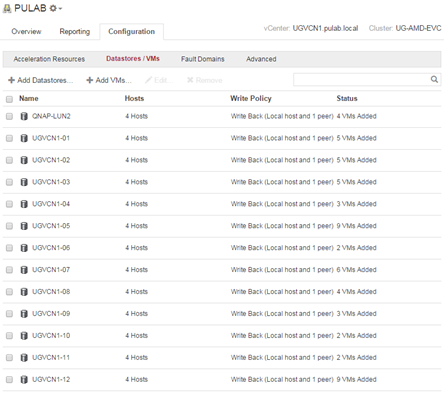
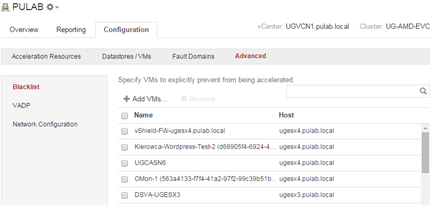
Then we can choose whether we add a specific VM or an entire datastore. I added all volumes, simultaneously in the Configuration –> Advanced –> Blacklists added the machines that should not be accelerated.
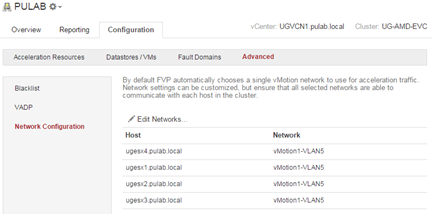
It is easy to notice that part of the tests turned on the writes acceleration. To guard against errors and losses (in the event of a host failure) I configured Fault Domain whose members came all the hosts of the cluster. Writes are always routed to the two hosts at the same time. When the trial period is over and uploaded “Freedom Edition” license, I’ll have to reconfigure the cluster so that it does not benefit from writes acceleration. In the last step you can configure the network with host communicate each other hosts. The default is selected any vMotion network, we can manually select a different (eg. a dedicated), I stayed with vMotion.
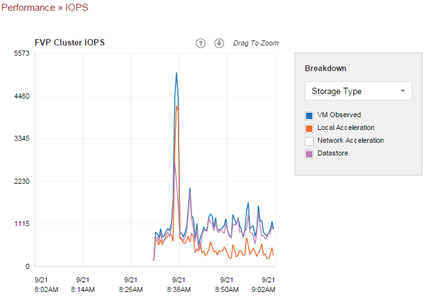
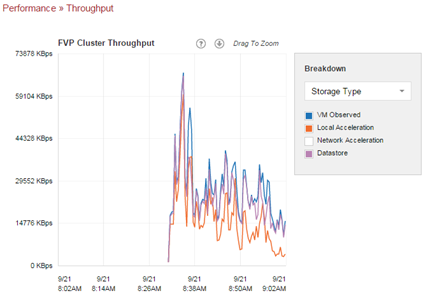
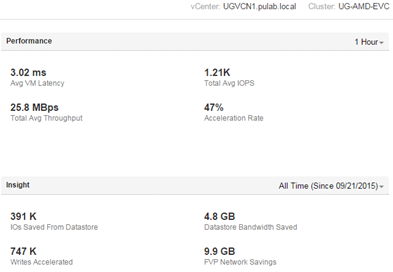
At this stage, the configuration PernixData FVP has been completed, from this point we can observe the effects. The most interesting thing is that we do not have here the period of “warming”, acceleration runs from the moment of switching at full speed. After a while in the Reporting we can watch the relevant graphs:
After five minutes from the start of acceleration we have almost 10GB traffic on the storage saved!
As for me, I would highly recommend PernixData FVP Freedom Edition, is the perfect solution for relieving storage.





2 Comments
Leave a reply →