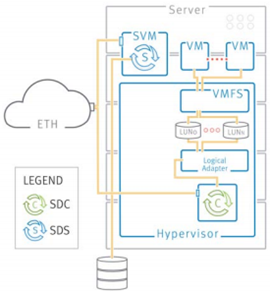
In the first part we prepared our environment for the ScaleIO installation. I immediately warn that the procedure of disc drives preparation to work as VMDK is very time-consuming. If we have in each server several large disks (the more the better) in the beginning we can choose the one disk per server. This will speed up the installation, which is of great importance if errors occur and we will have to undo the changes. At a later date, if all goes well, add the remaining disks. It is worth considering the structure of the whole, ScaleIO roughly corresponds to the one known in the disk array. So we have a disk pools to which we assign a specific drives (you do not need to have everything in one pool). Besides, in a similar way ESXi “sees” ScaleIO, SDC component presents itself as HBA (FC).
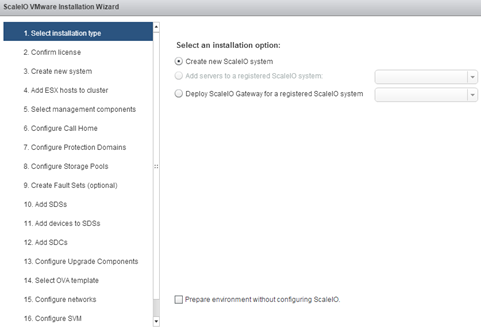
We begin by running the “Deploy ScaleIO Environment” option and go through all the configuration screens. It is the first installation, so choose the option “Create new ScaleIO system”. We can also select (at the discretion) to “prepare environment without configure”, this will significantly shorten the time needed to initiate the environment but all configuration settings and so we will have to do later. I suggest for the first time to perform the full procedure.
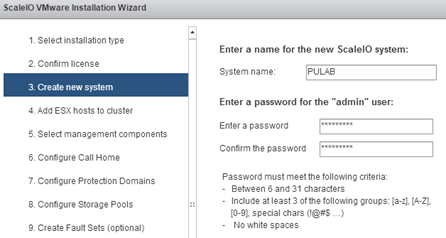
We give the name of our installation and password for the administrator (admin):
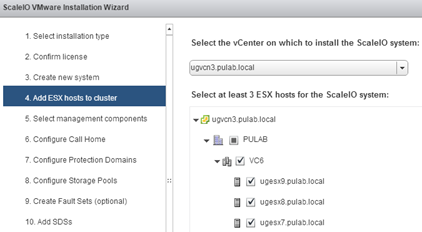
We choose which cluster and which hosts will be part of our ScaleIO installation:
We can choose which hosts will play the roles of Primary MDM, Secondary MDM and Tie-Breaker:
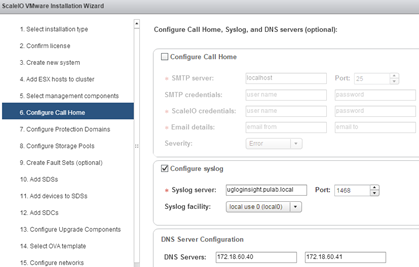
Configure the service “Call Home” and access to syslog (in this case, it is our VMware Log Insight):
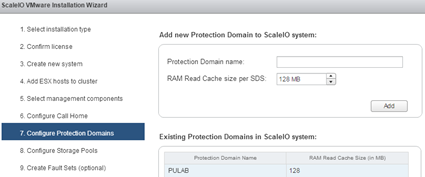
We configure our first “Protection Domain”. As you can see, at this stage we set the size of the cache in RAM which will use each of SDS. This value can be changed at a later date.
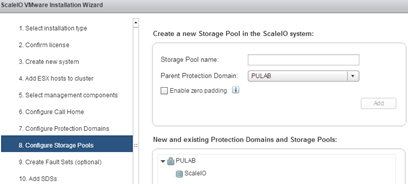
Within each domain, we can create some storage pools, on this screen define the name of the first pool (or more):
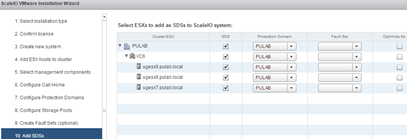
On this screen you can select which hosts install ScaleIO Data Server (choose course all the ESXi).
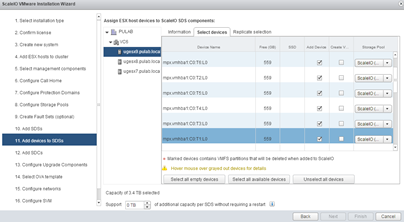
On this screen for each host individually select which disks will manage ScaleIO:
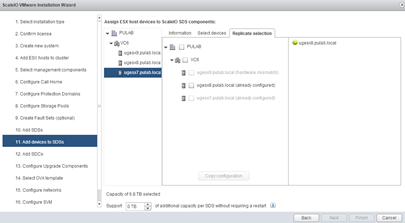
If you have identical hosts in terms of hardware configuration, you can copy the configuration screen (ie, marked discs) on the other hosts.
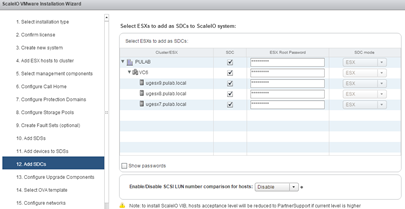
This screen might suggest reinstalling the SDC but it is not, on selected hosts SDC is configured (for communication with MDM). These settings can be checked on each ESXi before and after installation ScaleIO (command: cat /etc/vmware/esx.conf | grep scini).
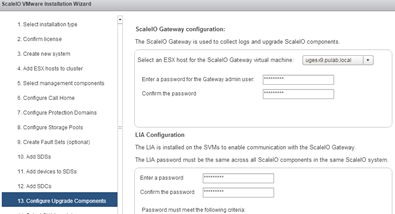
On this screen, select on which ESXi will be installed ScaleIO Gateway, and define a password using the IM logs on to the MDM.
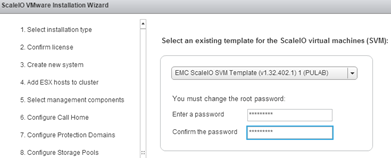
Select the previously loaded SVM template :
We provide management and transfer (for data replication) networks:
On the last screen we define the IP addresses. Here a very important piece of information, documentation misleading and saying to the network management must be added VMkernel. In fact, to the two networks must be added VMkernel (ie Management and Data network). Without VMkernel on data network configuration of the SDC has been executed incorrectly (!!!).
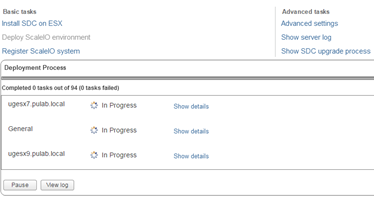
Run the installation process and wait. The installation includes initializing disks (eager zeroed), so it may take a very long time.
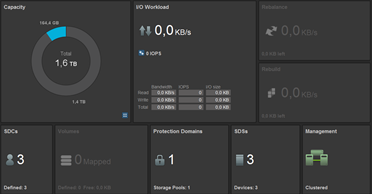
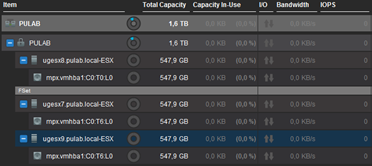
In the last step, before moving on to ScaleIO configuration, install the ScaleIO-GUI itself. Here surprise, the GUI installer is included in the “ScaleIO for Windows” and it be downloaded separately (in relation to the version for VMware). Once installed, we launch the console, give the IP address of the Primary MDM (login and password) and we can check the status of our environment:
In the next part we will configure ScaleIO, which will prepare the first volumes and export them to ESXi (and more).





2 Comments
Leave a reply →